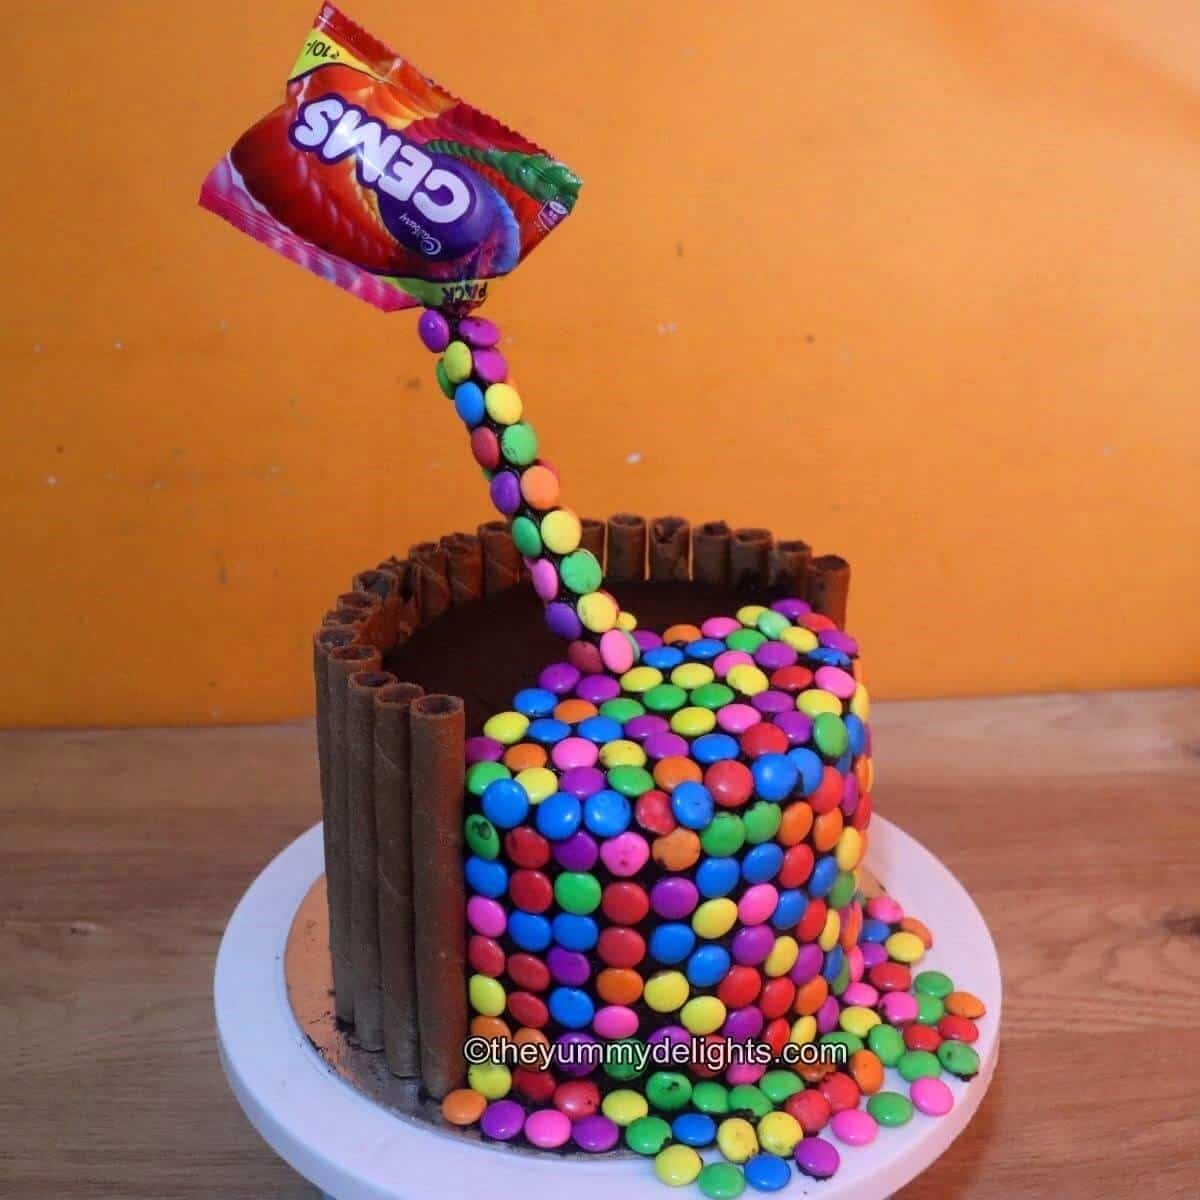
Gravity Defying Cake recipe with step by step photos & a recipe video. I made this gravity-defying cake with gems for my daughter’s birthday.

The cake is so soft & moist. The chocolate ganache is delectable. We enjoyed every bite of the cake.
The best part is that making gravity cake is very easy. It was so much fun to make this cake with your kids.
The wow expression in their eyes after the completion of the cake cleared that they loved it too.
In this post, I am sharing step by step process of making this gravity-defying cake. It is also known as Anti Gravity Cake. It is not only easy but also fun to make this cake.
Recipe features
- Quick & easy to make.
- Easy to customize – see the ingredient list below for alternative ingredients. You can add or skip the ingredients as per your taste.
- Vegetarian - No eggs are used to make the cake.
- Easy recipe for beginners.
Ingredients to make Gravity-defying cake
To make Sponge Cake
- Oil - Any cooking oil that does not have a strong smell can be used.
- Condensed Milk - It helps to make the cake rich in taste. But you can substitute it with thick yogurt or curd. Use either 1 cup of thick yogurt & 1 cup of sugar or if you do not have a sweet tooth then use ¾ cup of sugar.
- Vanilla Essence - gives a nice aroma to the cake.
- Maida (All-purpose flour)
- Baking powder, baking soda & salt
- Cocoa Powder - Use a good quality cocoa powder for the best taste.
- Milk - Use either full-fat milk or skimmed milk.
To make Chocolate Ganache
- Dark compound chocolate - You can use any brand of dark compound chocolate.
- Heavy cream or heavy whipping cream
To make sugar syrup
- Water & Sugar - Making sugar syrup is optional. You can make the sugar syrup by simply mixing sugar into the water. No need to heat it.
To make Gravity cake
- Gems - I have used 10 packets of Gems (Rs. 10 per packet). You can use any chocolate you like.
- Choco Sticks - You can use choco- sticks of any brand. Or use chocolate fingers or even Kit-Kat. If using Kit-Kat then you will need only one sponge cake to match the height of Kit-Kat.
- Firm Plastic Straw
For the detailed list of ingredients & their measurements, please check out the recipe card below.
How to make Gravity-defying Cake
Preparations:
- Preheat the oven to 180 degrees Celsius.
- Line the cake tin with parchment paper or butter paper & grease it lightly with oil.
Step 1: Making Chocolate Sponge Cake
- In a mixing bowl combine oil, condensed milk & vanilla essence. (image 1 & 2)
- Sift the dry ingredients (all-purpose flour, baking powder, baking soda, salt & cocoa powder) a little at a time. (image 3 & 4)
- Mix it with wet ingredients. (image 5 & 6)
- Add milk & mix. Do not over-mix the ingredients. (image 7)
- Sift the rest of the dry ingredients & mix with wet ingredients.
- The chocolate cake batter is ready. (image 8)
- Pour the batter into the cake tin.
- Tap it gently to remove any air bubble. (image 10)
- Bake it in a preheated oven at 180 degrees Celsius for 30 minutes. Every oven is different so timings may vary.
- Sponge cake is ready. Let it cool down for 5 minutes. (image 11)
- Release the sides with a knife & unmold it. Let it cool down completely. (image 12)
- Wrap it with a cling wrap & let it sit in the refrigerator for at least 2 hours. Better to make the sponge cake on the previous day.


Step: 2 Making Chocolate Ganache
- Heat water in a vessel over low heat. Place a heat-proof bowl filled with 2 cups of chopped chocolate over it. (image 13)
- Let the chocolate melt over low heat. Keep stirring it so that the heat distributes evenly. (image 14)
- Once the chocolate melts, remove from heat.
- Add 1 cup heavy cream to warm chocolate & mix. (image 15)
- Chocolate ganache is ready. (image 16)
- Let it sit for 2-3 hours at room temperature to set. Or you can make it the day before. Cover the bowl with a cling wrap & refrigerate.

Step: 3 Making the Gravity Cake
- Cut the sponge cake in half. I have baked 2 sponge cakes for making this cake. (image 17)
- Sugar syrup - Mix 2 teaspoon sugar in ¼ cup water. (Optional).
- Using a palette knife, apply chocolate ganache. (image 18)
- Place the other half of the sponge cake over it. (image 19)
- Repeat the process until you place the last layer of sponge cake.
- Given a slanting cut on the top layer to give a falling effect. This step is completely optional. You can skip it if you are a beginner.
- The crumb coat is done. Let it set in the refrigerator for an hour. (image 20)
- After an hour take it out from the refrigerator & apply chocolate ganache over it. (image 21)
- No need to apply it neatly. It will be covered with chocolate sticks & gems.
- Start sticking the chocolate sticks. (image 22)
- If you find it difficult to stick the chocolate sticks then apply chocolate ganache over it & stick it to the cake. Set it aside. (image 23 & 24)
- Insert a paper napkin inside the empty gems packet. This will make the packet look filled with gems. Set it aside. (image 25 & 26)
- Take a plastic straw & apply a thick layer of chocolate ganache over it.
- Stick the gems chocolate. Let it set in the refrigerator. (image 27 & 28)
- Start sticking the gems chocolate at the side of the cake. (image 29)
- Apply ganache at the bottom and stick the gems. (image 30 & 31)
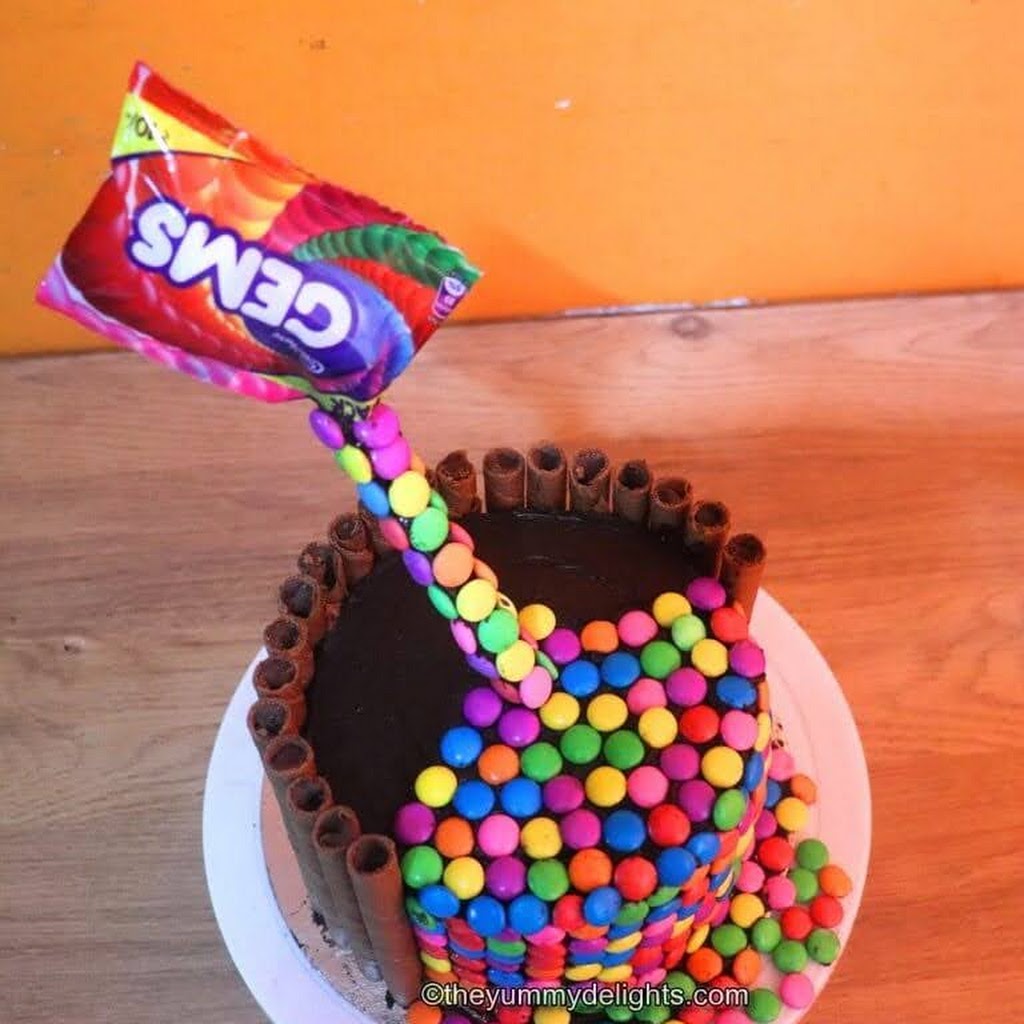
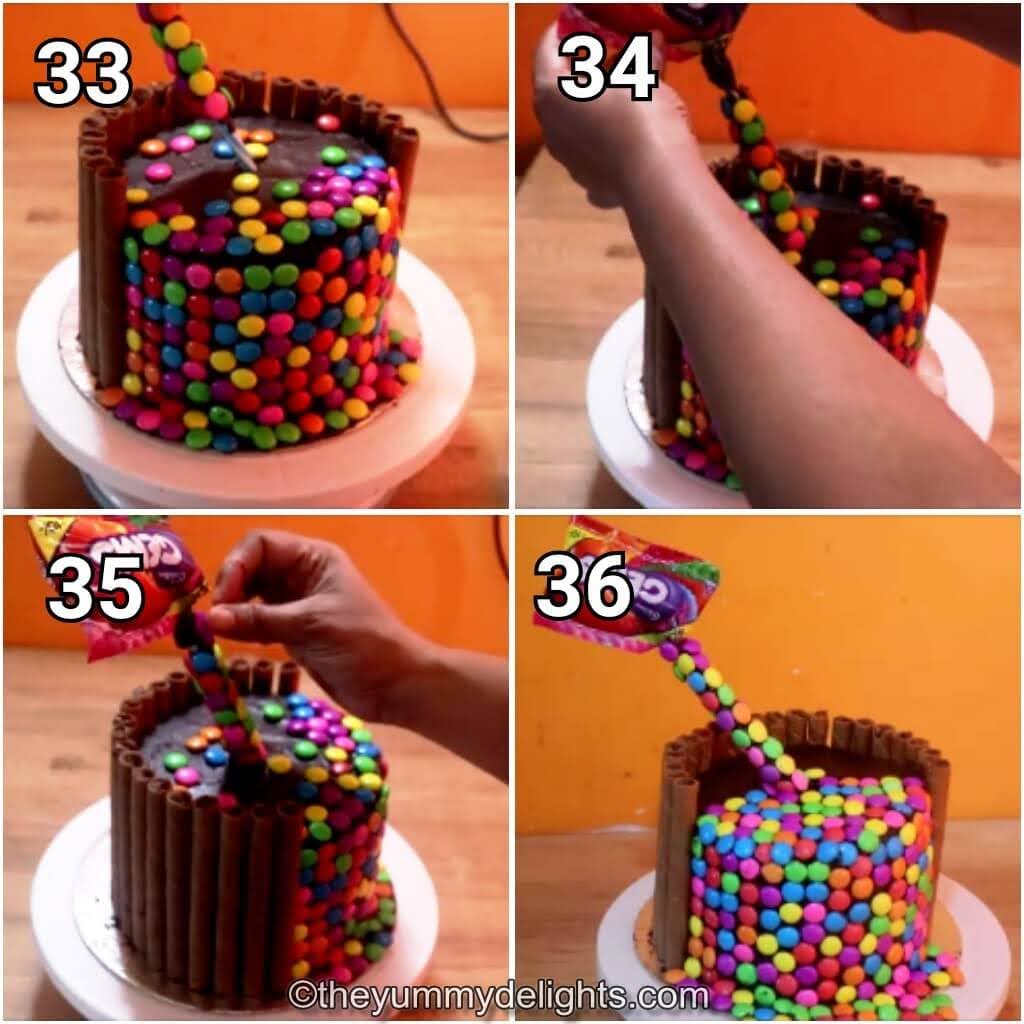
- Insert the straw with chocolates. To give it more stability, insert 2 skewers from the middle of the straw. (image 33)
- Now apply ganache over the top of the straw. Stick the gems packet over it.
- Cover the rest of the straw on top with gems.
- Gravity cake is ready. Serve and enjoy!


Cooking Tips
- Prepare the sponge cake a day before. Let it cool down completely. Wrap it with a cling film & place it in the refrigerator. It makes the sponge cake firm & it will be easier to work with it.
- I prefer to make the chocolate ganache the previous day. Let the ganache bowl set aside for 2 hours at room temperature. Then cover it with cling wrap & keep it in the refrigerator overnight.
- The ganache will become thick the next day & will be easier to work with it.
- To make Ganache, chop the chocolates finely. It will help the chocolate to melt quickly.
- You can completely skip adding the sugar syrup. Or use only water instead of sugar syrup to make the cake moist.
- After sticking the choco stick & gems, keep it in the refrigerator. Otherwise, the choco sticks will become soggy.
- Keep the cake refrigerated. Do not keep it at room temperature for a long time.
- Do not use any thin straw that bends to stick the gems. Use a firm plastic straw.
- Use skewers to hold the straw firmly in its place. First, insert the plastic straw into the cake. Then push two skewers from the middle of the straw. It will hold the straw firmly in its place.
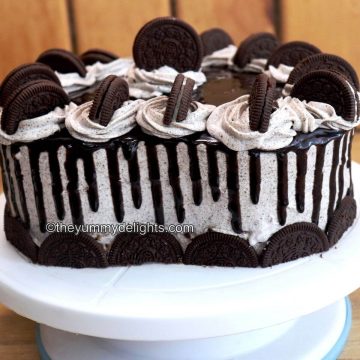
Related Recipes
Variations that you can try
- You can make a vanilla sponge cake or strawberry flavor cake.
- Stick Kit-Kat chocolate instead of choco sticks. Or you can use chocolate fingers.
- You can use whipped cream frosting or buttercream frosting instead of making chocolate ganache.
If you make this recipe, please leave a comment and a starred review below.
And, consider following me on social media so we can stay connected. I’m on Facebook, Pinterest, and YouTube!
Recipe Card
Gravity Defying Cake recipe | How to make Gravity Cake | Anti-Gravity Cake
Equipment
- Cake tin
- Heatproof bowl
- Cake stand
Ingredients
- 1.5 cups Maida All purpose flour
- 1 teaspoon Baking Powder
- ½ teaspoon Baking Soda
- A pinch of Salt
- ½ cup Cocoa Powder
- ½ cup milk
To make Chocolate Ganache:
- 2 cups chopped dark compund chocolate
- 1 cup heavy cream
To make sugar syrup:
- ¼ cup water
- 2 teaspoon sugar
To make Gravity cake:
- 10 packets Gems (Rs 10 per packet)
- 25 Choco sticks
Instructions
Preparations:
- Preheat the oven to 180 degrees Celsius.
- Line the cake tin with parchment paper or butter paper & grease it lightly with oil.
How to make Gravity cake
Step 1: Making Chocolate Sponge Cake
- In a mixing bowl combine oil, condensed milk & vanilla essence.
- Sift the dry ingredients (all-purpose flour, baking powder, baking soda, salt & cocoa powder) a little at a time. Mix it with wet ingredients.
- Add milk & mix. Do not over-mix the ingredients.
- Chocolate cake batter is ready.
- Pour the batter into the cake tin.
- Tap it gently to remove any air bubble.
- Bake it in a preheated oven at 180 degrees Celsius for 30 minutes. Every oven is different so timings may vary.
- Sponge cake is ready. Let it cool down for 5 minutes.
- Release the sides with a knife & unmold it. Let it cool down completely.
- Wrap it with a cling wrap & let it sit in the refrigerator for at least 2 hours. Better to make the sponge cake the previous day.
Step: 2 Making Chocolate Ganache
- Heat water in a vessel over low heat. Place a heat-proof bowl filled with 2 cups of chopped chocolate over it.
- Let the chocolate melt over low heat. Keep stirring it so that the heat distributes evenly.
- Once the chocolate melts, remove from heat.
- Add 1 cup heavy cream to warm chocolate & mix.
- Chocolate ganache is ready. Let it sit for 2-3 hours at room temperature to set. Or you can make it the day before. Cover the bowl with a cling wrap & refrigerate.
Step: 3 Making the Gravity Cake
- Cut the sponge cake in half. I have baked 2 sponge cakes for making this cake.
- Sugar syrup - Mix 2 teaspoon sugar in ¼ cup water. (Optional).
- Using a palette knife, apply chocolate ganache.
- Place the other half of the sponge cake.
- Repeat the process until you place the last layer of sponge cake.
- Given a slanting cut on the top layer to give a falling effect. This step is completely optional. You can skip it if you are a beginner.
- The crumb coat is done. Let it set in the refrigerator for an hour.
- After an hour take it out from the refrigerator & apply chocolate ganache over it.
- No need to apply it neatly. It will be covered with chocolate sticks & gems.
- Start sticking the chocolate sticks.
- If you find it difficult to stick the chocolate sticks then apply chocolate ganache over it & stick it to the cake. Set it aside.
- Insert a paper napkin inside the empty gems packet. The packet will look filled with gems. Set it aside.
- Take a plastic straw & apply a thick layer of chocolate ganache over it.
- Stick the gems chocolate. Let it set in the refrigerator.
- Start sticking the gems chocolate at the side of the cake.
- Apply ganache at the bottom and stick the gems.
- Insert the straw with chocolates. To give it more stability, insert 2 skewers in the middle of the straw.
- Now apply ganache over the top of the straw. Stick the gems packet over it.Cover the rest of the straw on top with gems.
- Gravity cake is ready. Serve & enjoy!
Video
Notes
1. Prepare the sponge cake a day before. Let it cool down completely. Wrap it with a cling wrap & place it in the refrigerator. It makes the sponge cake firm & it will be easier to work with it.
2. You can prepare the chocolate ganache a day before. It will become thick the next day & will be easier to work with it.
3. I have used 2 sponge cakes to make it.
4. You can completely skip adding the sugar syrup. Or use only water instead of sugar syrup to make the cake moist.
Nutrition
Nutrition information is automatically calculated, so should only be used as an approximation.


Share your thoughts