

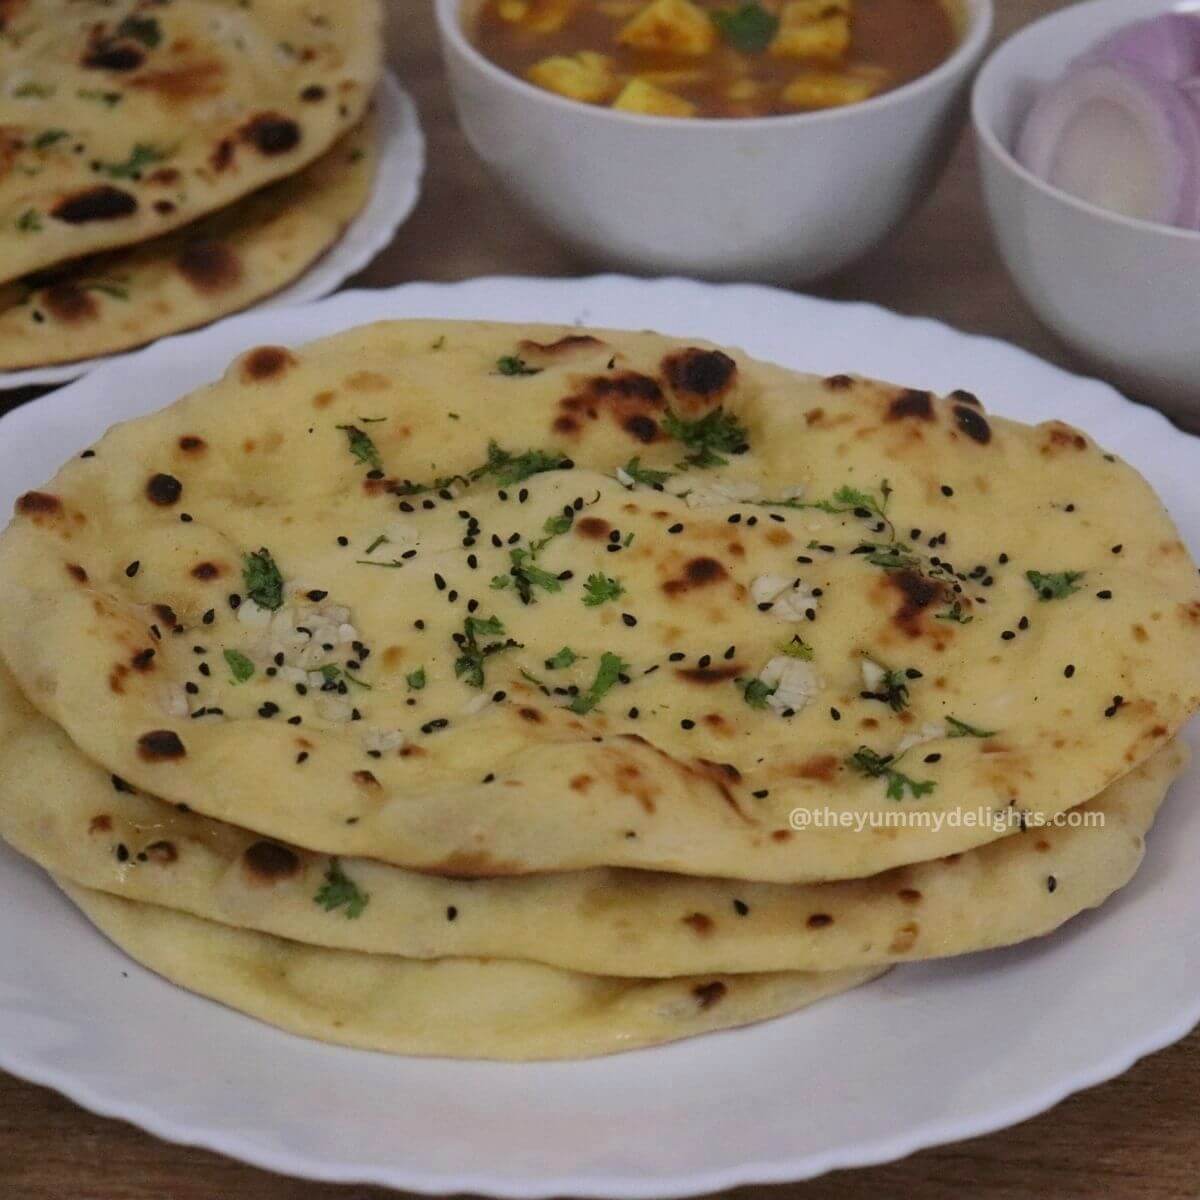
Learn to make a delicious homemade garlic naan bread recipe with yogurt. This easy, no-yeast naan recipe is made using flour, Greek yogurt, and a few other pantry staples. You'll be enjoying restaurant-quality buttery garlic naan in no time. This fluffy Indian flatbread is perfect for any occasion and can be easily cooked on your tawa or stovetop.
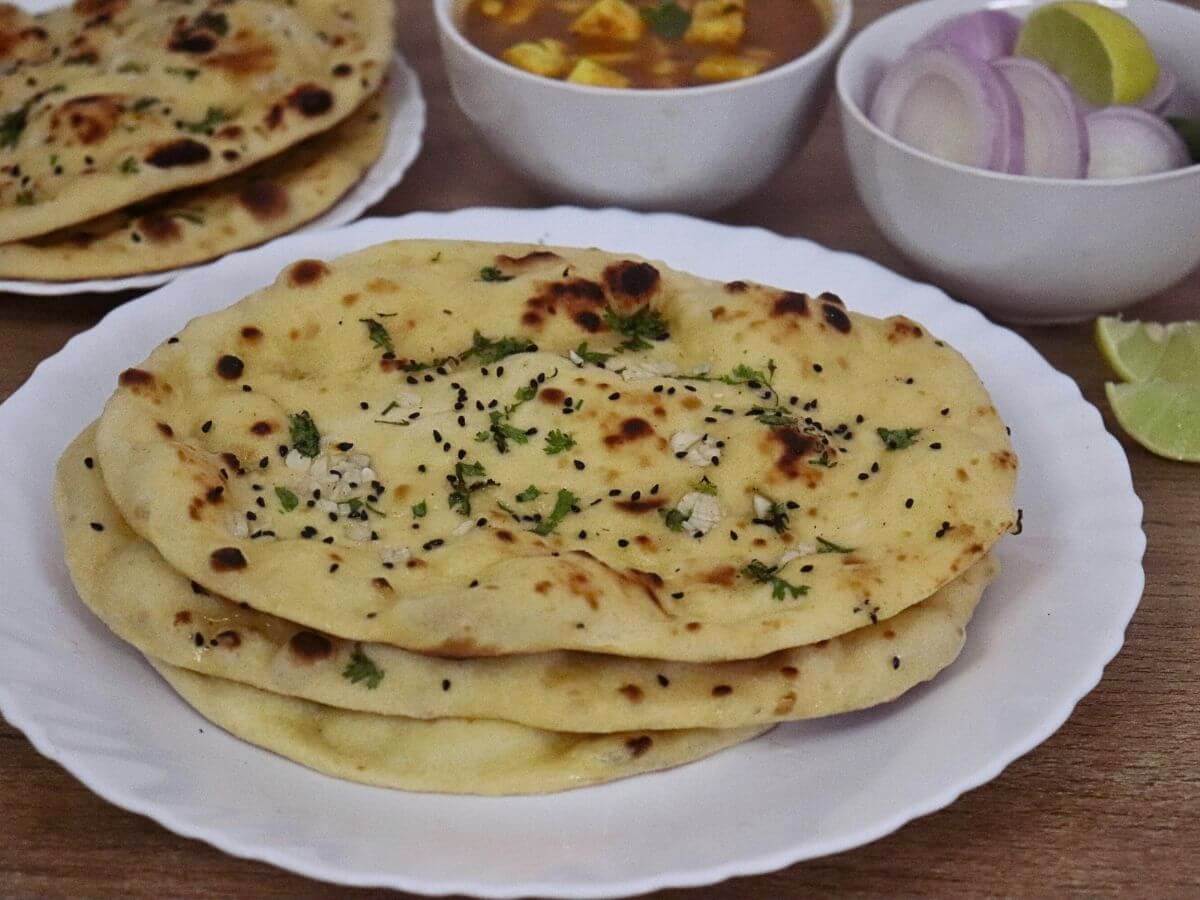
I've experimented with countless naan bread recipes, but this one is a true winner. After perfecting the measurements and technique through trial and error, I'm excited to share my secrets to nailing perfect no-yeast naan bread every single time. Bonus! I am sharing two different Naan recipes - Butter Naan and Garlic Naan (my favorite) in this recipe post.
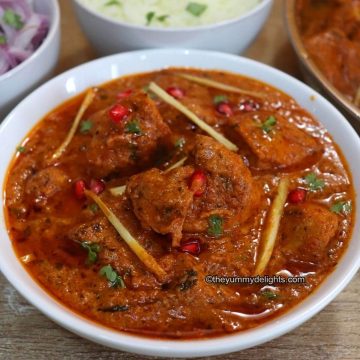
Here in this naan bread recipe with yogurt, I'll share common mistakes that I made while making Naan bread without yeast and their solutions. It will help you to get a soft and fluffy Naan with beautiful brown, bubbly blisters on the surface, just like tandoori Naan (without tandoor!). Serve it with Indian Butter Chicken, Dhaba Style Paneer Masala, or Chicken Pathia.
Jump to:
What is naan bread?
Naan is a kind of leavened flatbread of South Asian and Central Asian origin, particularly popular in Indian cuisine. It is made with a combination of flour, yeast, salt, and water. It has a light and fluffy texture.
Naan bread has numerous tiny air bubbles throughout, giving it a soft and somewhat chewy bite, unlike pita bread, which has a single, big air pocket.
About This No Yeast Naan Bread Recipe
Traditionally, naan dough uses yeast to rise. In this easy Naan bread recipe, yogurt replaces yeast for a speedy rise along with baking powder and baking soda, giving you soft, pillowy flatbreads.
In addition to this, yogurt adds a slight tangy flavor to the Naan dough that complements curries like Chicken Korma or Bhuna Chicken Masala beautifully, while keeping the naan moist and tender, even after reheating.
Naan gets its signature golden brown spots from the intense heat of a tandoor oven. We usually don't have a tandoori oven at home, so similar golden spots can be achieved by using a cast-iron skillet or griddle.
This recipe will guide you on how to make Naan on a Tawa (griddle). No tandoori oven is needed. We will make it on the stovetop. Let's see how to make this recipe.
Ingredient Notes
Yogurt is one such ingredient that's always in my pantry. Unlike yeast, which isn't always on hand, yogurt offers a fantastic alternative for making Naan bread without yeast. Yogurt, along with baking powder and baking soda, results in the best restaurant-worthy Naan bread recipe at home.
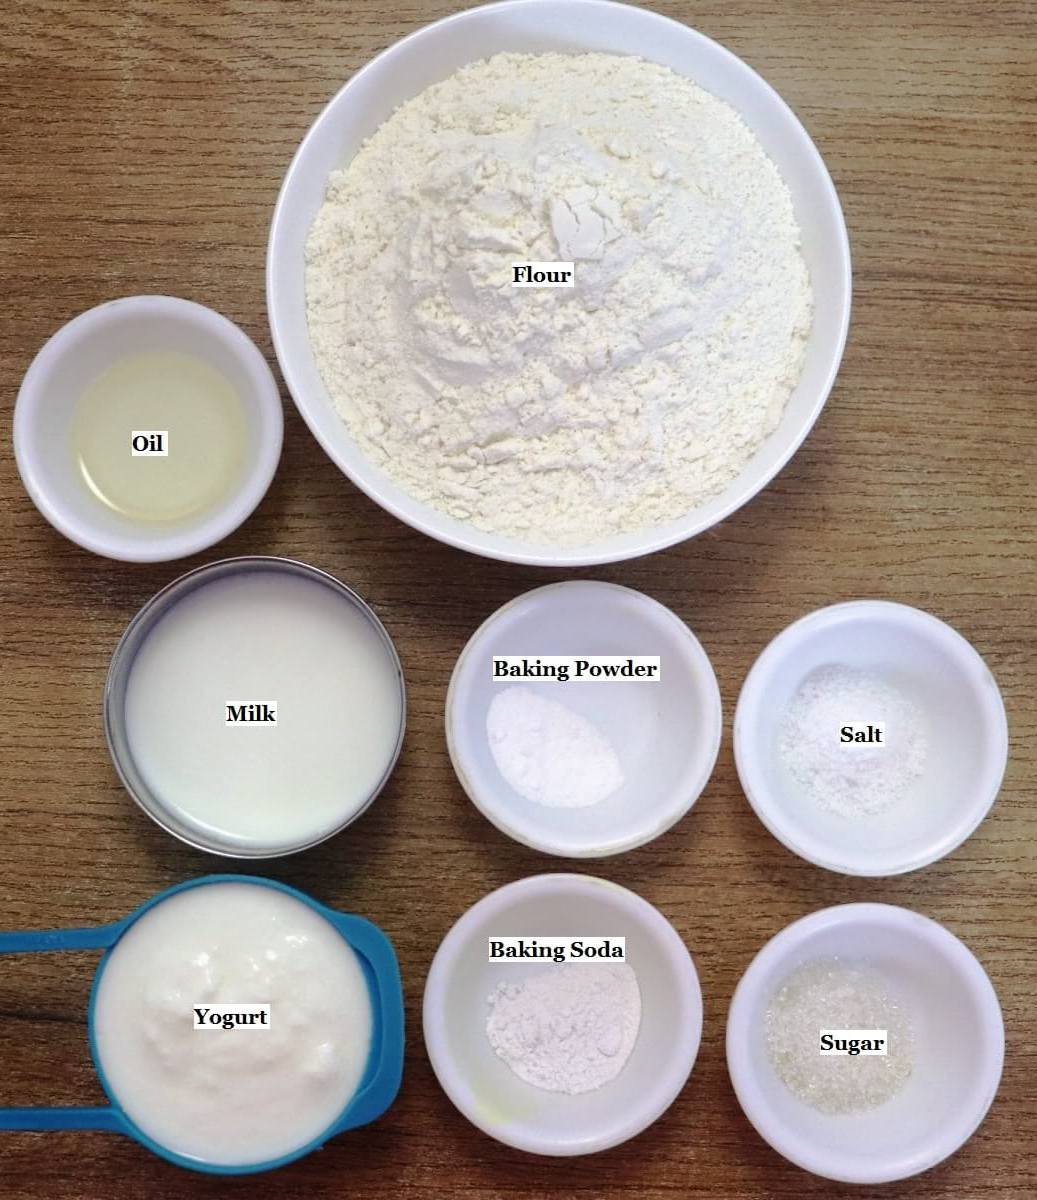
See the recipe card at the end of the post for full ingredients, quantities, and a printable version.
- Flour: I have used all-purpose flour (Maida) to make the dough. You can also use a combination of all-purpose flour and wheat flour in a ratio of 1:1 for more nutritious Naan.
- Yogurt: The star ingredient in this Naan bread recipe. Greek yogurt or any full-fat yogurt can be used for this naan recipe. Yogurt's natural acidity helps leaven the dough, creating a soft and fluffy texture similar to what we get from yeast.
- Baking Powder & Baking Soda: These leavening agents work together with the yogurt to create air pockets in the Naan bread dough, resulting in a light and fluffy naan. Do not skip them. They are a must when making Naan bread with yogurt.
- Milk: I have used lukewarm milk. Lukewarm milk helps make the dough soft and gives the naan a tender texture. You can substitute it with water.
How to Make Naan Bread Recipe with Yogurt (Step-by-Step Photos)
Here I am sharing the recipe for Garlic Naan. The only difference between garlic naan and butter naan is the garlic. Skip it, and you have a simple butter naan.
1) Prepare your naan dough. In a large mixing bowl, combine ½ cup yogurt, ¼ cup lukewarm milk, 1 tablespoon oil, and 2 teaspoons of sugar (image 1). Add 2 cups flour, ½ teaspoon of salt, ½ teaspoon baking powder, and ¼ teaspoon baking soda to this mixture (image 2).

2) Combine all the ingredients. Initially, it will not bind together (image 3). Now gradually add 1-2 teaspoons of lukewarm milk to the dough and knead until it comes together like a big ball (images 4 & 5). Avoid adding too much milk at once to prevent a sticky mess. Once the dough ball is formed, add 1 teaspoon of oil all over the dough.

3) Knead the dough for 10 minutes or until the dough becomes smooth and elastic. Initially, the dough will be sticky and will not stretch (image 6). However, as you continue kneading, it will gradually become smoother, less sticky, and stretchier (image 7).

4) At this point, stop kneading (Don't overdo it. Otherwise, the dough will be hard). It's only a 10-minute workout, and believe me, the result is fabulous. Not kneading the dough will result in dense and heavy Naan bread.
5) Apply 1 teaspoon of oil over it (images 8, 9, & 10). Cover and let it rest for at least 45 minutes to a maximum of 2 hours.

6) After two hours, knead the dough once and divide it into six equal-sized balls (images 11 & 12). Smooth the top surface of the ball by tucking the edges of the dough into the center. Watch the video for more clarity.

7) Roll the naan dough. On a lightly floured surface, roll out each ball into a thin oval or circle, about ¼ inch thick (images 13 &14).

8) Sprinkle with kalonji or nigella seeds (optional), coriander leaves, and finely chopped or minced garlic. Roll the dough lightly once more to stick the toppings (images 15 & 16).

9) Apply water. Lightly brush or sprinkle water on the bottom side of the naan. This helps the naan stick to the tawa (griddle) (image 17).

10) Heat the tawa. Preheat a cast-iron tawa over medium-high heat. To check if it is hot enough, sprinkle a few drops of water on the surface. They should sizzle and evaporate quickly.
11) Cook the naan. Carefully place the naan on the hot tawa, wet side down. Cook until the surface starts to brown and the naan puffs up with air pockets (image 18).
12) For traditional tandoori-style char marks: Once the naan starts puffing, carefully hold the cast-iron tawa upside down over a low gas flame. See this process (images 19 & 20). Move the tawa around so the naan cooks evenly and develops light char marks. Use the tawa handle and keep a safe distance from the flame. Watch the recipe video for this step.

13) If using a non-stick pan: Do not place the pan over an open flame. Flip the naan on the pan and cook the other side for a few seconds, until lightly browned and charred. Transfer to a plate and immediately brush with melted butter. This helps keep the naan soft for longer.

14) Enjoy your freshly cooked garlic naan immediately. Pair it with curries, dips, or simply savor it on its own.
Naan Bread Variations
I have shared my favorite Garlic Naan recipe above in this post. You can make butter naan with the same recipe. Skip the addition of garlic, and your Butter Naan or Plain Naan is ready.
Tips to make the best naan bread from scratch
- Addition of milk: Add lukewarm milk to activate the baking powder and baking soda, resulting in softer naan bread. Incorporate the milk gradually (1-2 teaspoons at a time) into the combined dough ingredients, kneading until a cohesive dough forms.
- Avoid adding excessive milk: I made this mistake many times, as this can create a sticky mess. If the dough becomes too sticky, incorporate additional flour, one tablespoon at a time. Don't add too much flour; it will result in dense Naan.
- Kneading the dough: It helps to develop the gluten in the flour, resulting in smooth, pliable dough that is easy to shape and gives the naan its elastic texture. It incorporates air into the dough, which leads to a lighter and fluffier naan. I've tried making naan without kneading, and the difference in texture and rise is quite noticeable.
- Resting the dough: While yogurt offers a faster rise than yeast, a 1-2 hour rest can still be beneficial for optimal results in a naan bread recipe. Resting allows the gluten to relax after kneading, making it easier to handle and shape. The resting period gives time to meld the flavors in the dough.
- Cooking on high heat: Cooking naan bread requires high heat for a desirable crunch on the outside while the inside remains soft and airy due to the bread's structure and the short cooking time.
- For the toppings, if you don't have kalonji or nigella seeds, skip them. You can skip garlic to make butter Naan or plain Naan bread.
- Don't overcook the naan. Once the naan begins to puff up (usually within 60 seconds on a heated tawa), it's time to flip it over. Cook the other side for about 60 seconds more. Look for golden brown spots as a sign of doneness.
Recipe FAQs
Naan is the ultimate companion to Indian curries. Its soft, pliable texture makes it ideal for enjoying dishes like Indian Butter Chicken, Tikka Masala, Dal Makhani, Balti Chicken, and Chicken Pathia.
Or you can try any of these delicious curry recipes.
Yogurt adds moisture, a slightly tangy flavor, and fat to the dough, resulting in soft Naan bread.
No, if you are following this naan bread recipe, do not substitute yogurt with milk.

Recipe Card
Naan Bread Recipe with Yogurt
Video

Equipment
- 1 large mixing bowl
- 1 cast iron skillet or non-stick pan
Ingredients
For the Naan dough
- ½ cup full fat yogurt or greek yogurt (do not used flavored yogurt)
- ¼ cup milk luke warm
- 1 tablespoon oil any cooking oil with neutral flavor
- 2 teaspoon sugar
- 2 cups all-purpose flour (Maida)
- ½ teaspoon salt
- ½ teaspoon baking powder
- ¼ teaspoon baking soda
Other ingredients
- (Kalonji) Nigella seeds (optional)
- coriander leaves, finely chopped, as needed
- 4-6 finely chopped garlic cloves
- Melted butter, for brushing
Instructions
- Prepare your naan dough: In a large mixing bowl, combine yogurt, lukewarm milk, oil, and sugar. To this mixture, add flour, salt, baking powder, and baking soda.
- Combine all the ingredients. Initially, it will not bind together. Now gradually add 1-2 teaspoons of lukewarm milk to the dough and knead until it comes together like a big ball. Avoid adding too much milk at once to prevent a sticky mess. Once the dough ball is formed, add 1 teaspoon of oil all over the dough.
- Knead the dough: Knead for 10 minutes or until the dough becomes smooth and elastic. Initially, the dough will be sticky and will not stretch. However, as you continue kneading, it will gradually become smoother, less sticky, and stretchier. At this point, stop kneading (don’t overdo it otherwise, the dough will be hard). It's only a 10-minute workout, and believe me, the result is fabulous. Cover and let it rest for at least 45 minutes to maximum 2 hours. Not kneading the dough will result in dense or heavy Naan bread.
- Roll the naan dough. After two hours, knead the dough once and divide it into six equal-sized balls. Smooth the top surface of the ball by tucking the edges of the dough into the center. Watch the video for more clarity. On a lightly floured surface, roll out each ball into a thin oval or circle, about ¼ inch thick. Sprinkle with kalonji or nigella seeds (optional), coriander leaves, and garlic. Roll the dough lightly once more to stick the toppings.
- Apply water. Lightly brush or sprinkle water on the bottom side of the naan. This helps the naan stick to the tawa (griddle).
- Heat the tawa. Preheat a cast-iron tawa over medium-high heat. To check if it is hot enough, sprinkle a few drops of water on the surface. They should sizzle and evaporate quickly.
- Cook the naan. Carefully place the naan on the hot tawa, wet side down. Cook until the surface starts to brown and the naan puffs up with air pockets.
- For traditional tandoori-style char marks: Once the naan starts puffing, carefully hold the cast-iron tawa upside down over a low gas flame. Move the tawa around so the naan cooks evenly and develops light char marks. Use the tawa handle and keep a safe distance from the flame. Watch the recipe video for this step.
- If using a non-stick pan: Do not place the pan over an open flame. Flip the naan on the pan and cook the other side for a few seconds, until lightly browned and charred. Transfer to a plate and immediately brush with melted butter. This helps keep the naan soft for longer.
- Enjoy your freshly cooked garlic naan immediately. Pair it with curries, dips, or simply savor it on its own.
Notes
- You can easily double or triple the recipe.
- Addition of milk - Add lukewarm milk to activate the baking powder and baking soda, resulting in softer naan bread. Incorporate the milk gradually (1-2 teaspoons at a time) into the combined dough ingredients, kneading until a cohesive dough forms.
- Avoid adding excessive milk (I made this mistake many times), as this can create a sticky mess. If the dough becomes too sticky, incorporate additional flour, one tablespoon at a time. Don’t add too much flour it will result in tough Naan.
- Kneading the dough - It helps to develop the gluten in the flour resulting in smooth, pliable dough that is easy to shape and gives the naan its elastic texture. It incorporates air into the dough which leads to a lighter and fluffier naan. I've tried making naan without kneading, and the difference in texture and rise is quite noticeable.
- Resting the Dough - While yogurt offers a faster rise than yeast, a 1-2 hour rest can still be beneficial for optimal results in naan dough. Resting allows the gluten to relax after kneading, making it easier to handle and shape. The resting period gives time to meld the flavors in the dough. A longer rest of 2 hours can lead to a slightly chewier naan compared to a shorter rest of 45 minutes to 1 hour.
- Cooking on high heat - Cooking Naan bread requires high heat for desirable crunch on the outside while the inside remains soft and airy due to the bread's structure and the short cooking time.
- For the toppings, if you don’t have kalonji or nigella seeds simply skip it. But coriander leaves are a must. You can skip garlic to make butter Naan or plain Naan bread.
- Don't overcook the naan. Once the naan begins to puff up (usually within 60 seconds on a heated tawa), it's time to flip it over. Cook the other side for about 60 seconds more. Look for golden brown spots or char marks as a sign of doneness.
- Flour choice - I have made Naan with all-purpose flour, wheat flour, and a combination of both. I found that all-purpose flour produced the best Naan bread. When wheat flour is added, the Naan becomes slightly harder compared to using only all-purpose flour. However, for a more nutritious option, a combination of both flours in a ratio of 1:1 works well. I wouldn't recommend making Naan solely with wheat flour.
Nutrition
Nutrition information is automatically calculated, so should only be used as an approximation.



Preeti
This naan bread with yogurt recipe is a keeper. The combination of fluffy bread and tangy yogurt creates a symphony of taste that will leave you wanting more. I highly encourage everyone to give this simple yet incredibly rewarding recipe a try and share your delicious creations with me.