

Karanji is a traditional Maharashtrian sweet made during Diwali and other festive occasions. These crispy, deep-fried half-moon-shaped pastries are filled with a sweet coconut-rava mixture, nuts, raisins, and sesame seeds. In this recipe, I'll share my tips for making soft, melt-in-the-mouth stuffing, shaping the karanji, and frying them until golden and crispy, with step-by-step photos and a video.
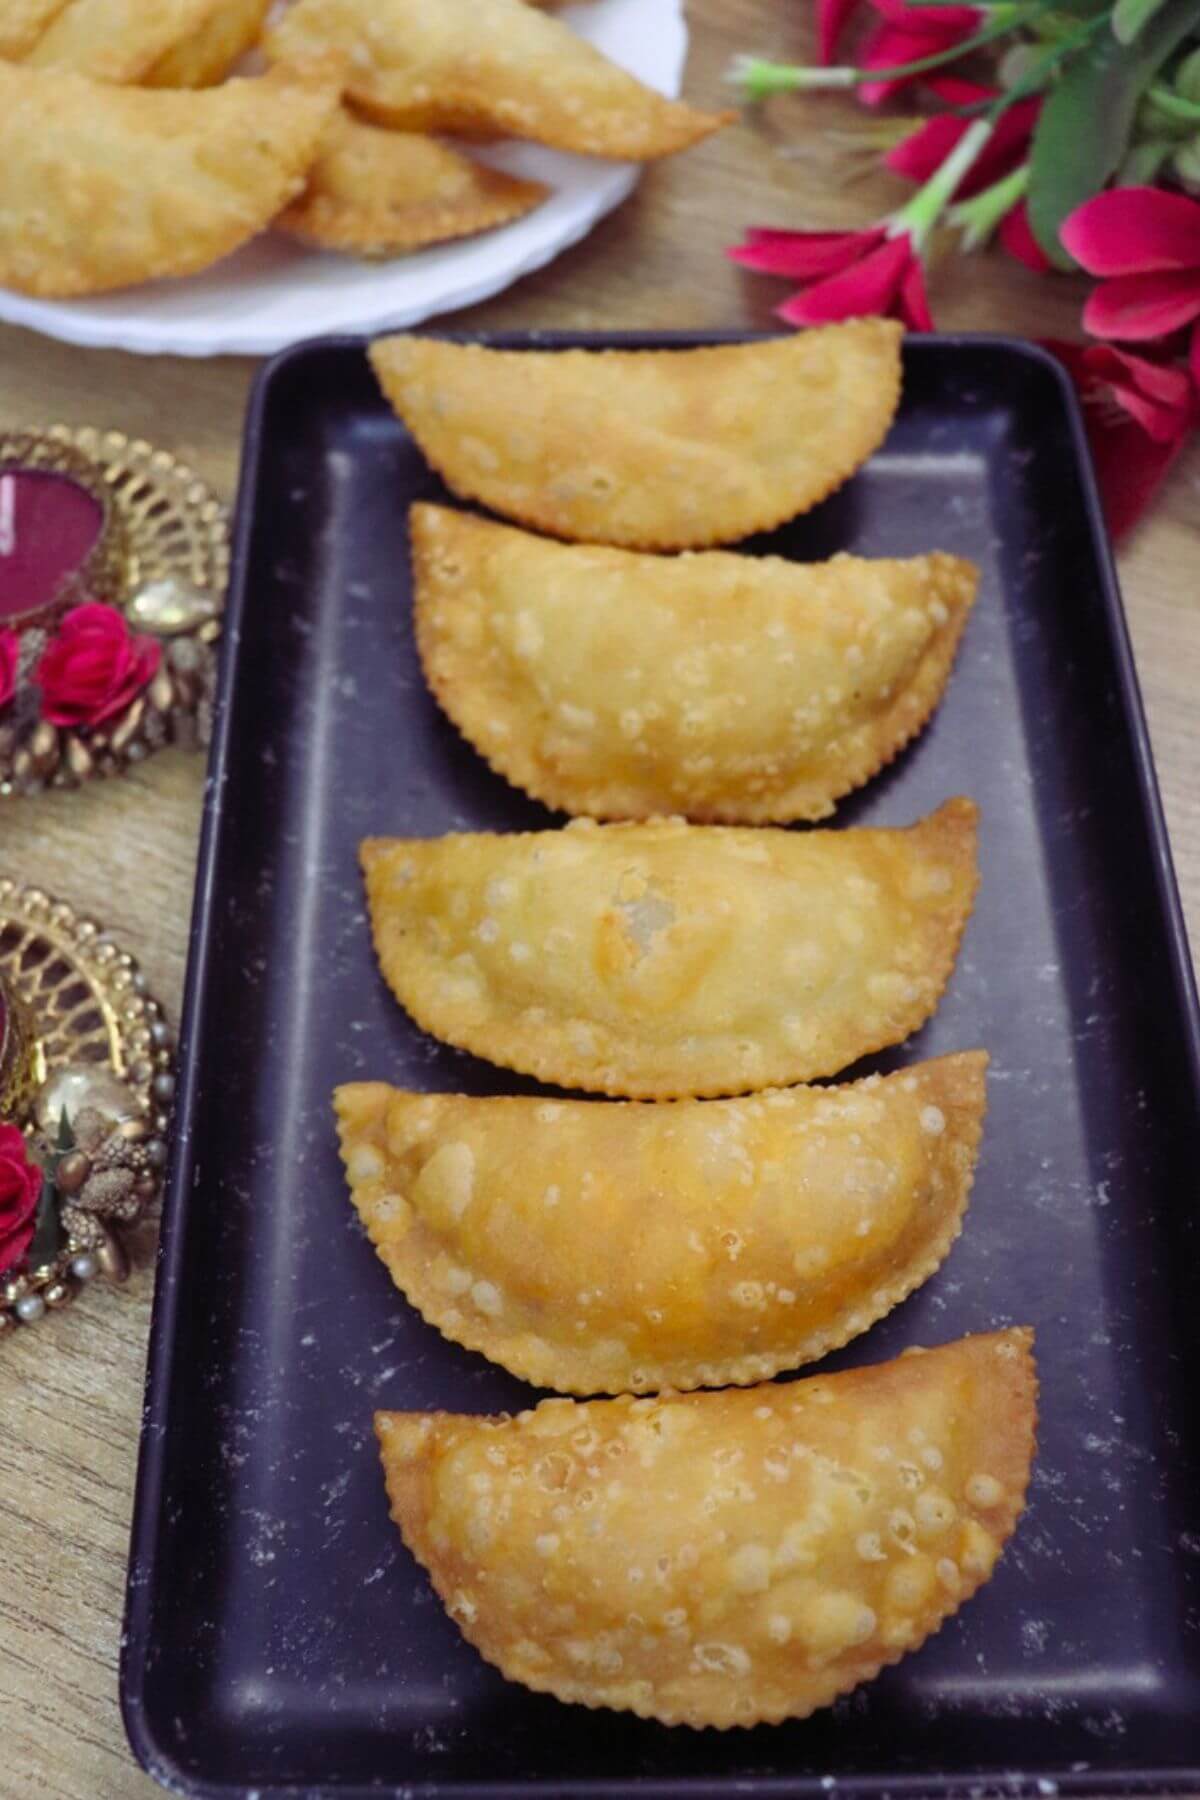
What is Karanji?
Karanji is a popular Maharashtrian sweet with a crisp, flaky outer covering made from maida (all-purpose flour). It is filled with a sweet mixture of coconut, sugar or jaggery, nuts, raisins, and cardamom.
Maharashtrian Karanji is traditionally prepared during Diwali as part of Diwali Faral, as well as during Ganesh Chaturthi and other festive occasions. My mom used to make karanji during these festivals, while our North Indian neighbours made gujiya for Diwali.
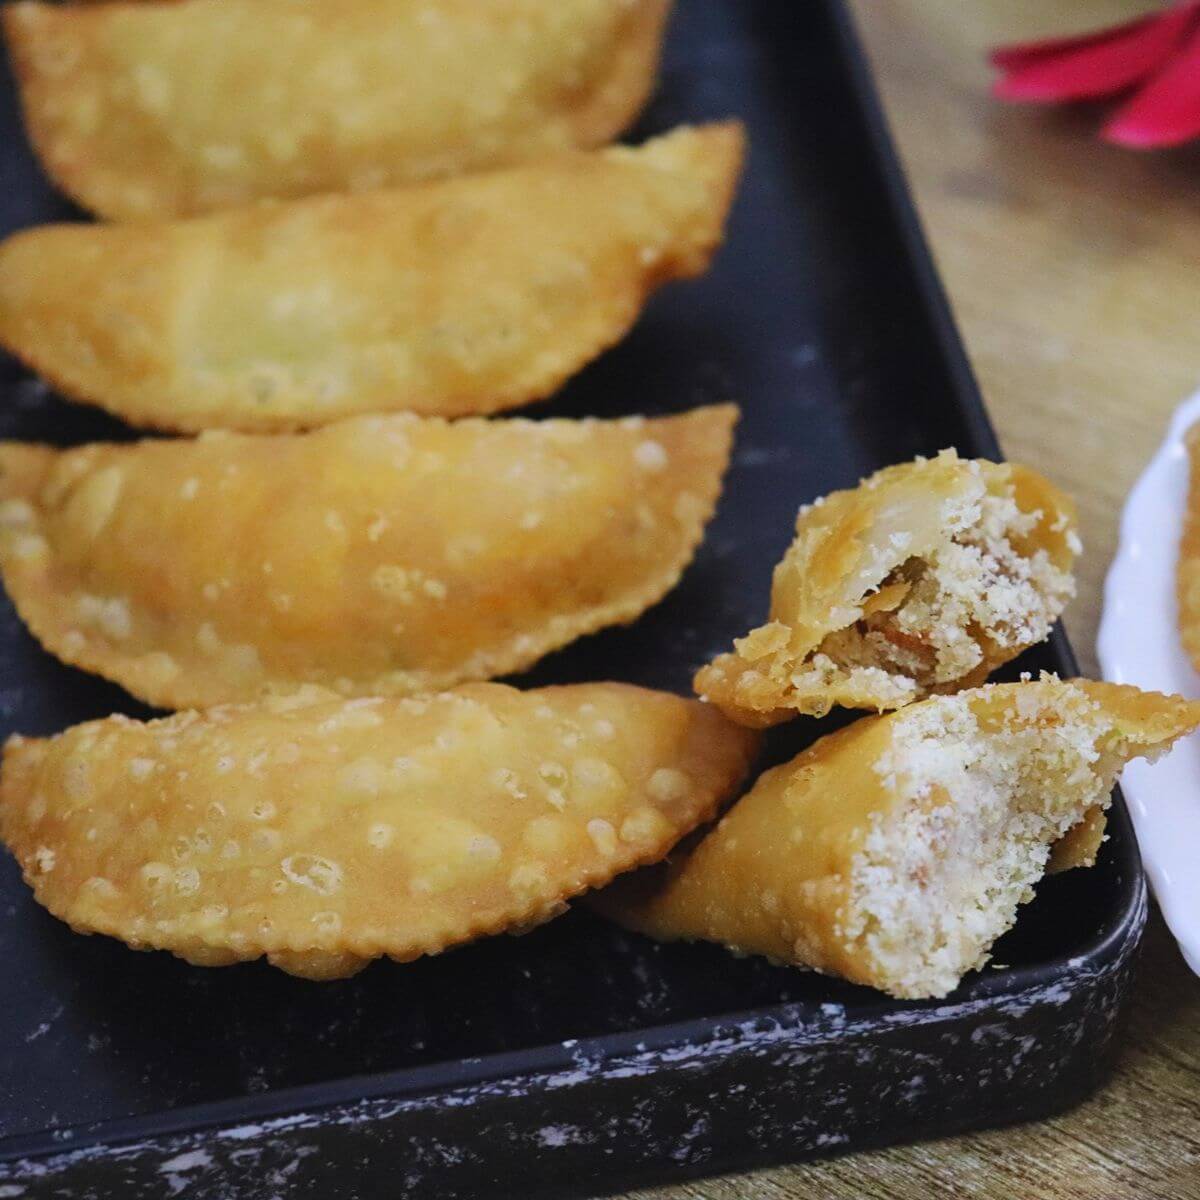
Gujiya and Karanji are both half-moon-shaped sweets that look like an empanada, but their fillings differ. During Diwali, we would exchange platters of homemade sweets and savoury snacks with our neighbours. It was a lovely tradition that brought everyone together.
Whenever I make Karanji at home, it disappears fast. I usually make extra during Diwali to share with friends and family. I have also shared other Karanji recipes, including Ola Narlache Karanji and Tikhat Karanji.
This Karanji recipe is similar to Goan Coconut Rava Neureo. Both have a crispy outer covering and a sweet coconut-rava filling. In Goa, karanji is called neureo and is traditionally prepared during Ganesh Chaturthi, Diwali, and Christmas as part of kuswar, a collection of traditional Goan Christmas sweets and snacks.
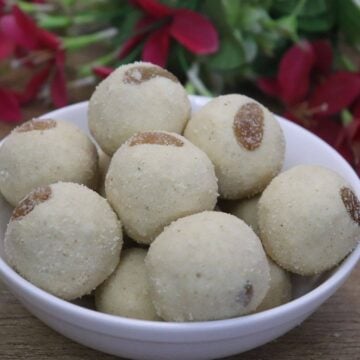
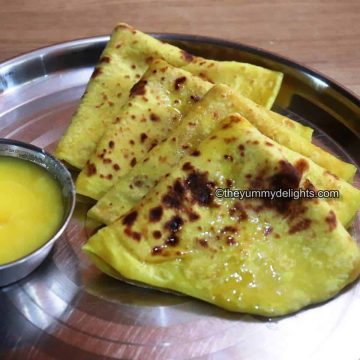
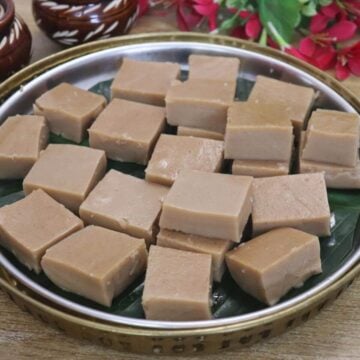
You might also like these Maharashtrian festive recipes
Ingredient Notes
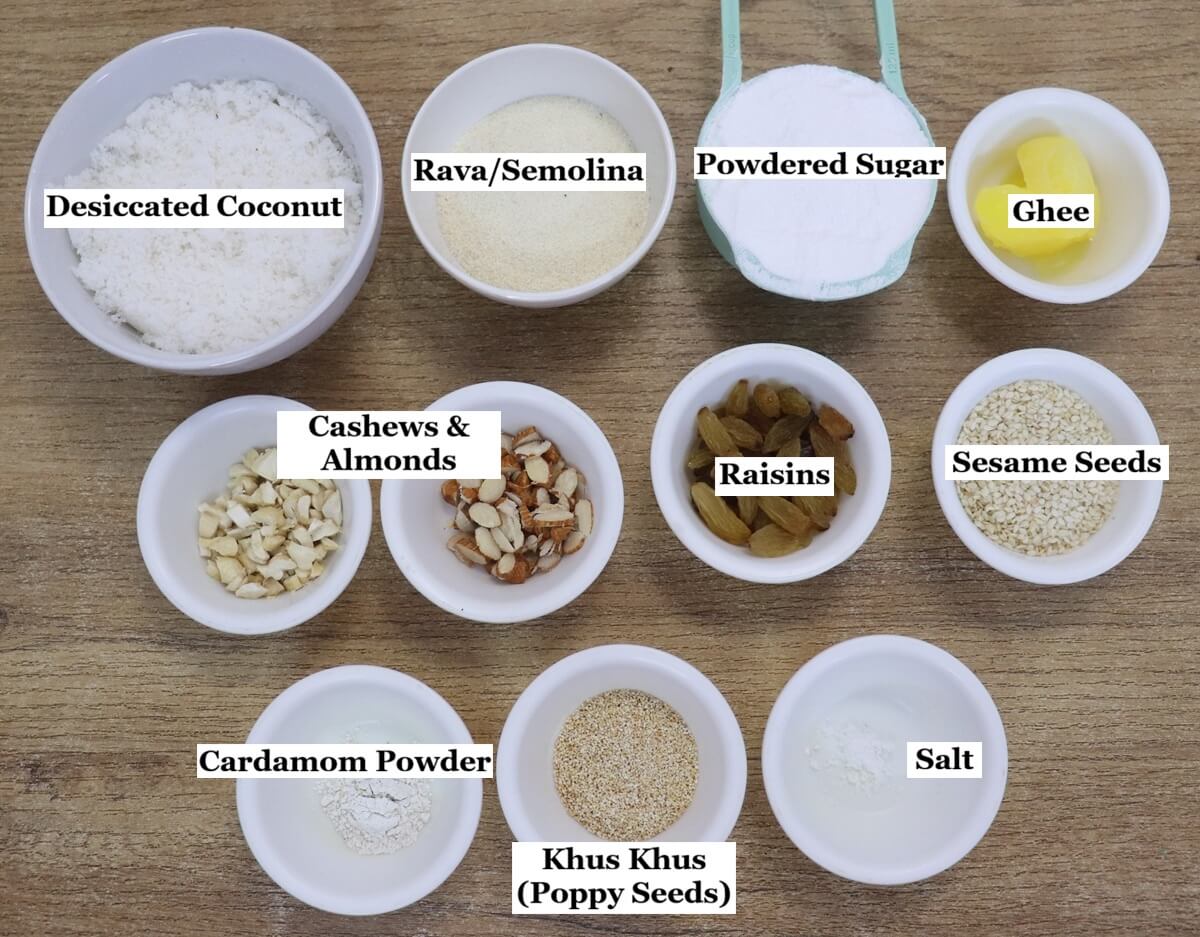
See the recipe card at the end of the post for full ingredients, quantities, and a printable version.
- Desiccated coconut: I used dry coconut to prepare the filling. Sun-dry it for a day before using it. You can also use store-bought desiccated coconut.
- Rava (semolina): Use fine rava, also called barik rava or ladoo rava, for the filling. If you only have coarse rava, pulse it in a mixer grinder for a few seconds until it becomes finer. Do not grind it into a powder.
- Powdered sugar: You can substitute it with powdered jaggery.
- Poppy seeds: You can skip poppy seeds if they are not available.
- Nuts: Use any nuts of your choice, such as almonds, cashews, or pistachios. Chop them into small pieces so they mix well with the filling.
- Oil: You can use any cooking oil with a high smoke point and neutral flavor.
How to Make Karanji Recipe
For the Karanji Cover (Dough)
Step 1: In a mixing bowl, add 2 cups of all-purpose flour (maida), ¼ cup rava, and salt to taste (image 1). Combine with a spoon.
Step 2: Heat ¼ cup oil in a small tadka pan until hot. Carefully pour it over the flour mixture (image 2). Mix with a spoon as the oil is hot (image 3).
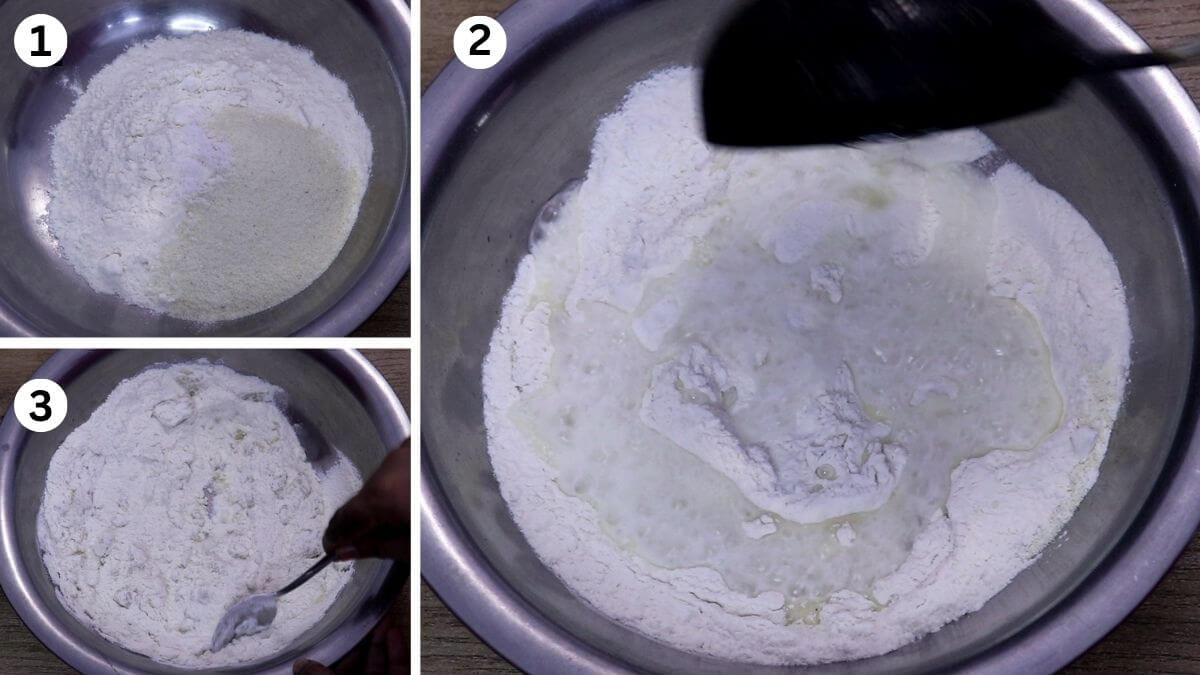
Step 3: Once the mixture has cooled slightly, rub the oil into the flour with your fingers until it is evenly combined. It makes the outer covering crispy and flaky. Take a handful of the flour mixture and press it firmly in your palm. If it holds its shape, it is ready (image 4).
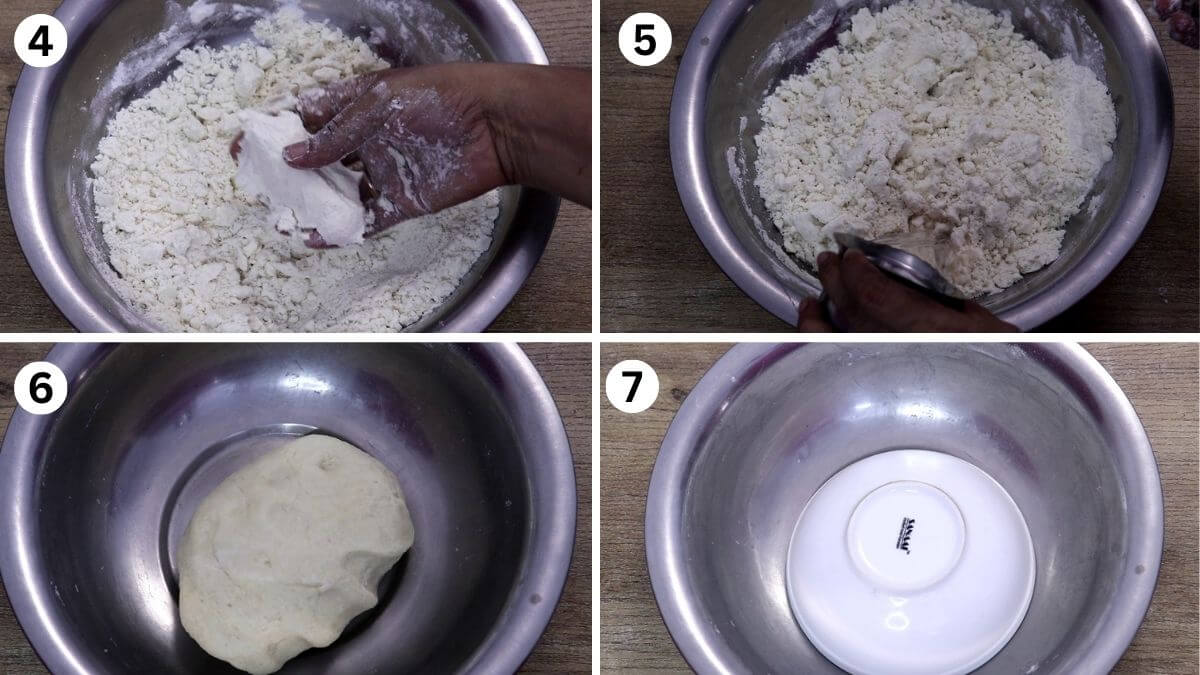
Step 4: Add water little by little and knead into a semi-stiff dough (images 5 & 6). The dough should be slightly firmer than the dough you prepare for roti or chapati. Cover the dough and let it rest for 30 minutes (image 7). Meanwhile, let's prepare the stuffing.
Make the Stuffing (Coconut-Rava Stuffing)
Step 5: Take one dry coconut and remove the hard outer brown shell using a peeler (images 8 & 9).
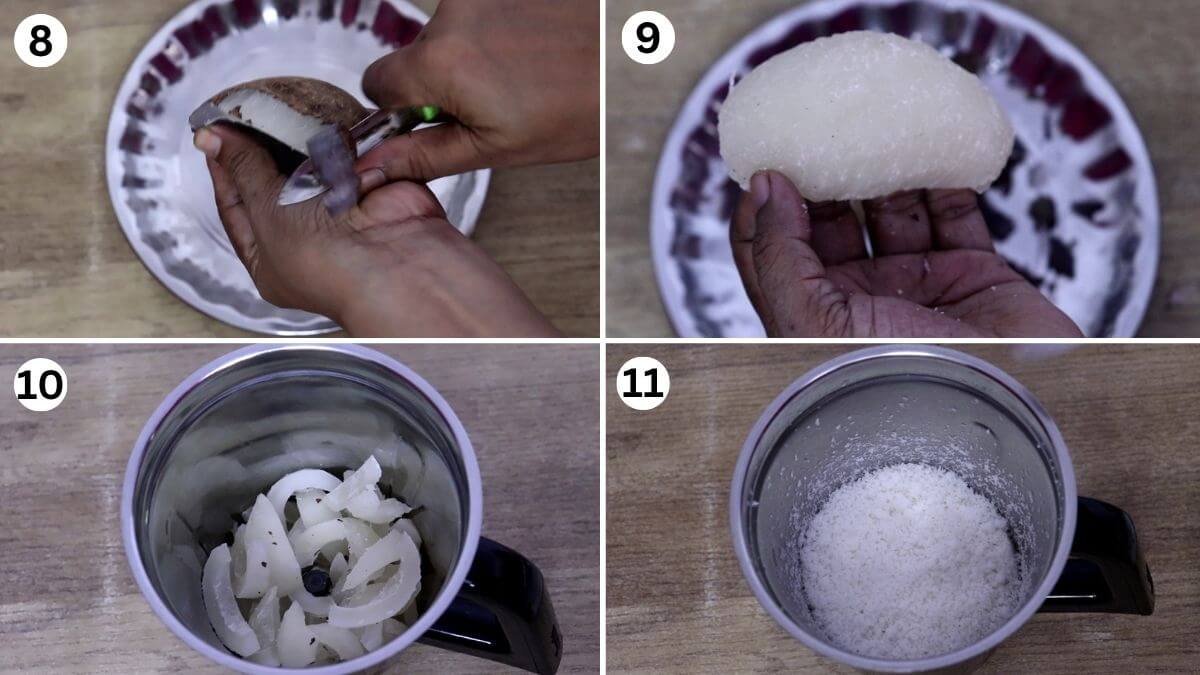
Step 6: Roughly chop the dry coconut into small pieces. Transfer them to a mixer grinder (image 10). Pulse a few times. Stop and check in between. Do not grind continuously, as the coconut may release oil and turn into a paste. Desiccated coconut is ready (image 11).
Step 7: Measure ½ cup of the prepared desiccated coconut for the stuffing. You can also use store-bought desiccated coconut instead and skip steps 5 & 6.
Step 8: Heat 1 teaspoon ghee in a pan over low heat. Add the ½ cup coconut powder, sesame seeds, and poppy seeds. Roast on low heat, stirring continuously, until the coconut turns lightly golden. Do not let it turn brown. Transfer the mixture to a plate and keep it aside to cool down (image 12).
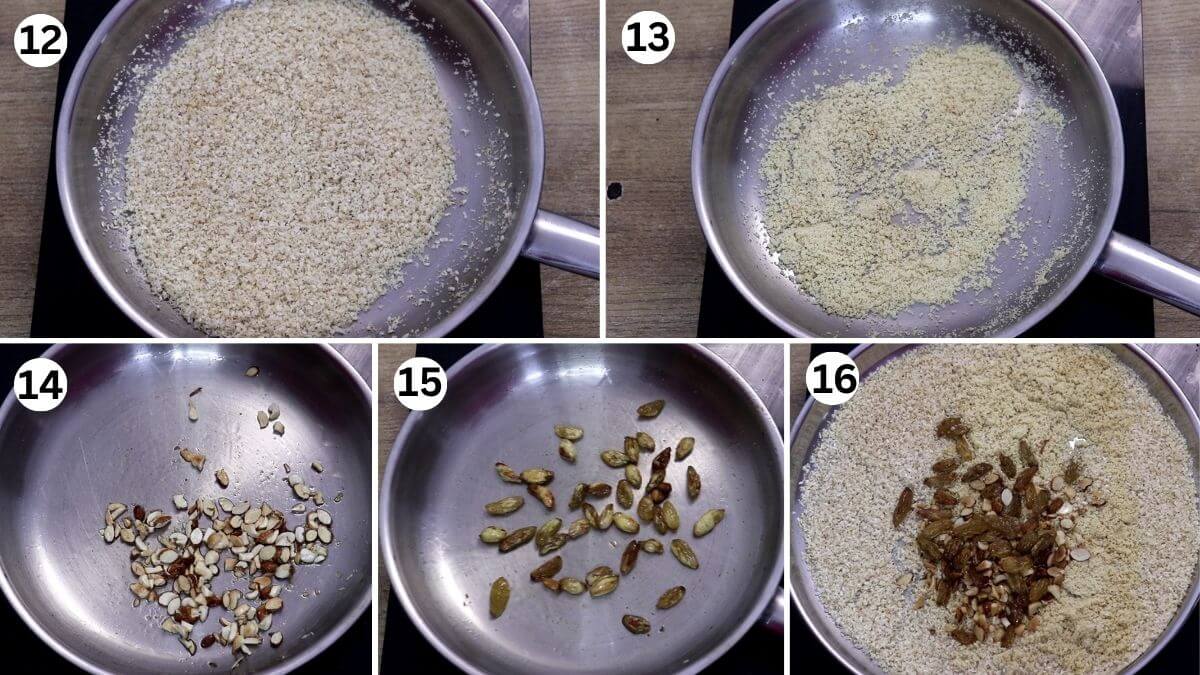
Step 9: Heat 1 tablespoon ghee in the same pan over low heat. Add 3 tablespoon fine rava and roast, stirring continuously, until it turns lightly golden (image 13). Transfer it to the same plate with the roasted coconut.
Step 10: Heat 1 teaspoon ghee in the pan over low heat. Add the chopped almonds and cashews. Roast until lightly golden, then transfer them to the same plate (image 14).
Step 11: Add 1 teaspoon ghee to the pan and add the raisins. Roast until the raisins puff up (image 15). Transfer them to the same plate. Let all the roasted ingredients cool completely on the plate.
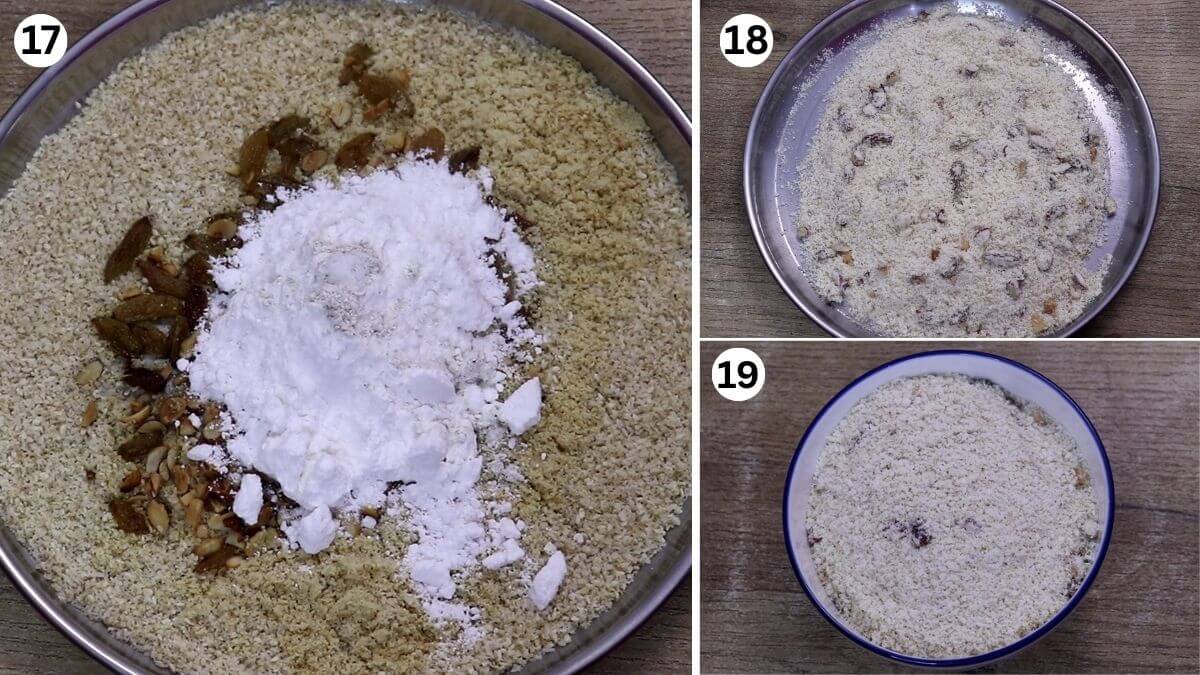
Step 12: Add ½ cup powdered sugar, 1 teaspoon cardamom powder, and a small pinch of salt to the plate (image 17). If you like, add a pinch of nutmeg powder for extra flavour. Mix everything well (image 18). The stuffing is ready (image 19). Keep it aside.
Shaping Karanji
Step 13: After resting the dough for 30 minutes, knead it again briefly. Divide the dough into 3 portions (image 20). Keep two portions covered while working with the first.
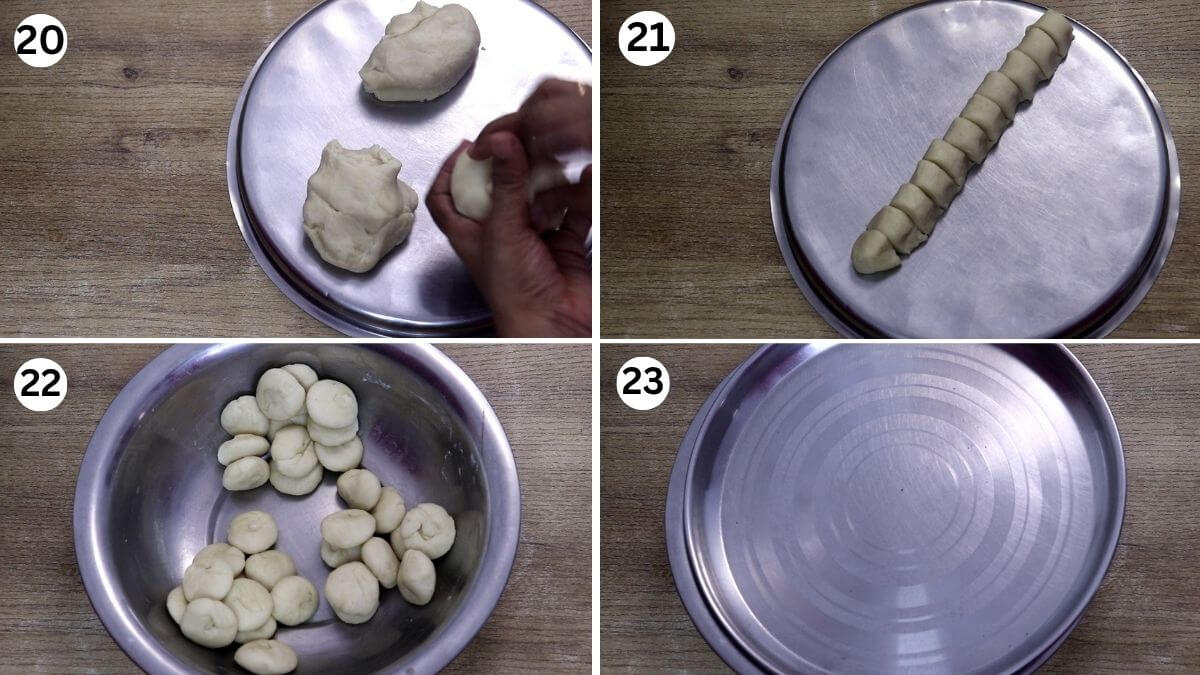
Step 14: Shape one portion into a log and cut it into approximately 1-inch pieces (image 21). Roll each piece between your palms into a smooth ball (image 22). Keep the dough balls covered to prevent them from drying out (image 23). Repeat with the remaining dough portions.
Step 15: Take one dough ball and flatten it slightly. Dust with a little flour and roll it into a small circle. Do not roll the dough too thin or too thick (images 24 & 25).
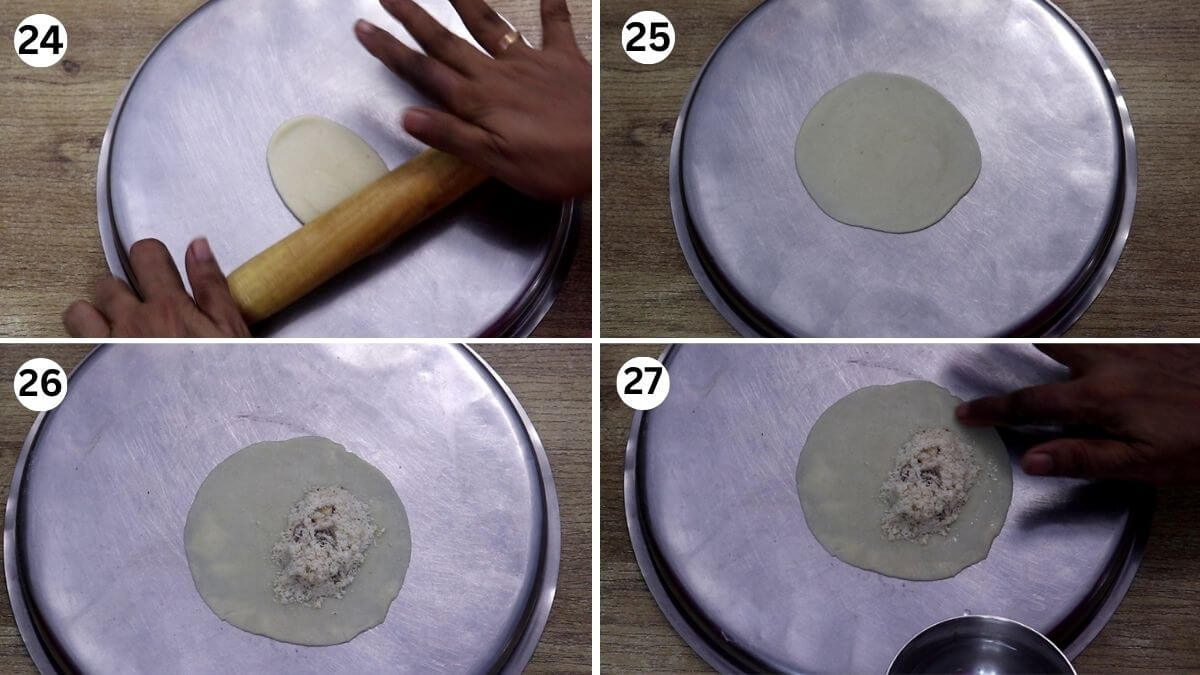
Step 16: Place a spoonful of stuffing on the lower half of the rolled circle, leaving the edges empty (image 26). Apply a little water along the edges (image 27).
Step 17: Fold the rolled dough over the filling to form a half-moon shape (images 28 & 29). Press the edges firmly to seal the Karanji and prevent the stuffing from coming out while frying Karanji (image 30).
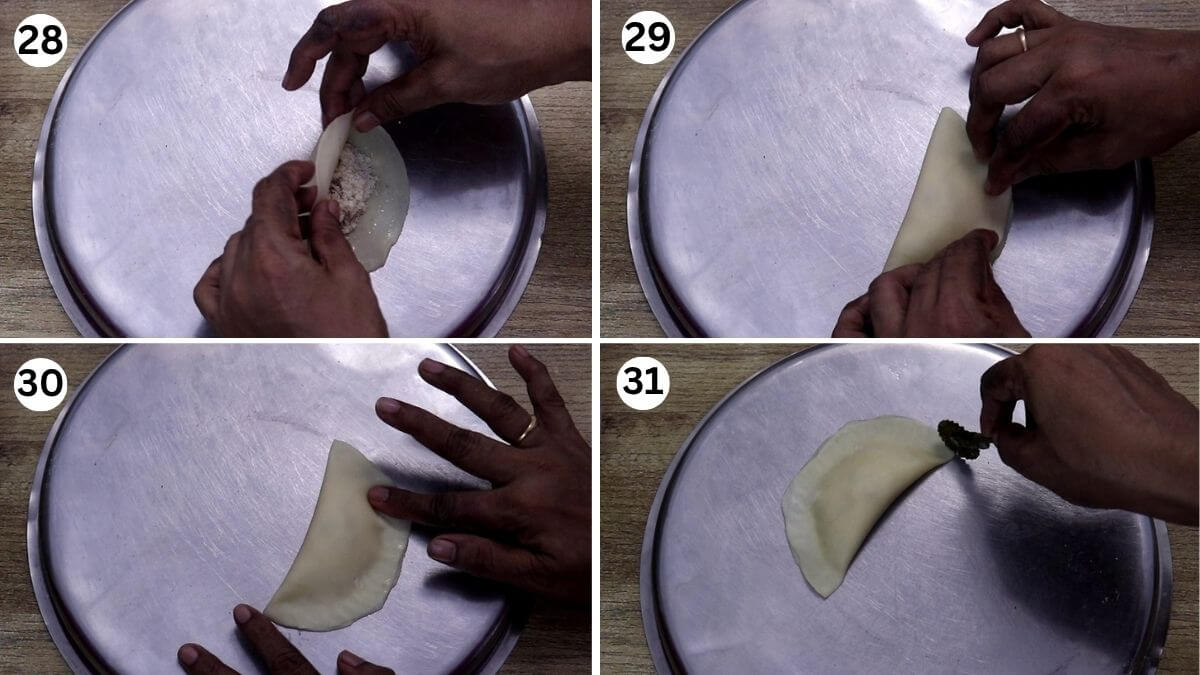
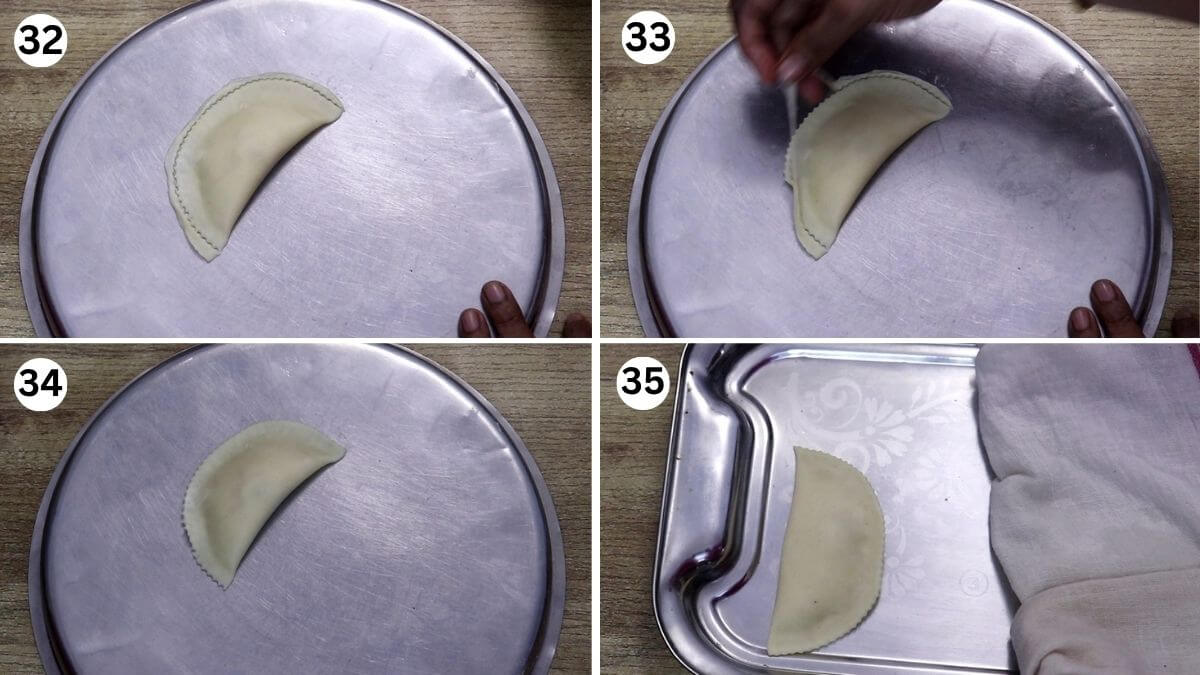
Step 18: Use a karanji cutter or pizza cutter to trim the edges (image 31 & 32). Collect the trimmed dough and add it to the remaining dough to make more karanji (image 33). Keep the shaped karanji covered with a slightly damp cloth.
Note: Do not overfill the karanji or spread the filling along the edges. This makes sealing difficult, and the karanji may break in the oil.
Using a Karanji mould: Place the rolled dough over the open Karanji mould. Add a spoonful of stuffing in the centre. Apply a little water along the edges of the dough. Fold the mould and press firmly to seal the Karanji. Open the mould and remove the shaped Karanji. Trim away any excess dough from the edges and keep it aside to reuse.
You can also seal and decorate the edges of the Karanji using a fork. Gently press the edges with the fork to seal them.
Frying Karanji
Step 19: Heat oil in a deep pan over medium heat. Once the oil is medium hot (not very hot), reduce the heat to low.
Oil temperature test: Drop a small piece of dough into the hot oil to check the temperature. If it sinks to the bottom without bubbles, the oil is not hot enough. If it browns immediately, the oil is too hot. It should rise slowly to the surface with small bubbles around it.
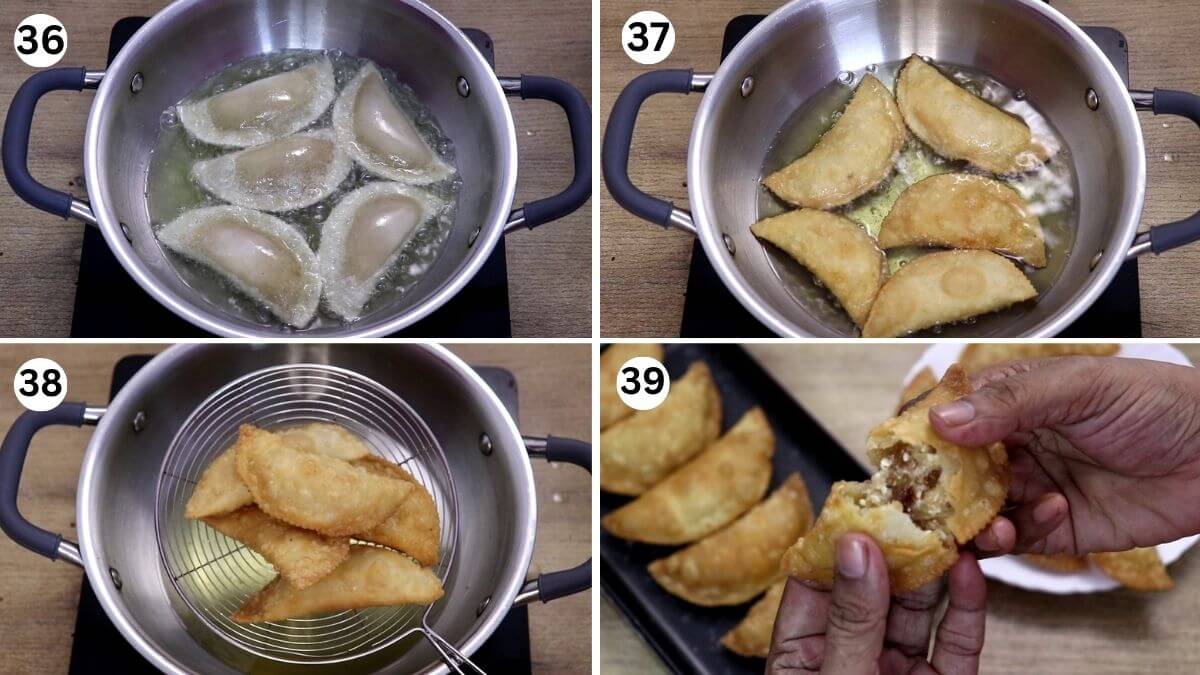
Step 20: Carefully add the Karanji to the oil (image 36). Do not overcrowd the pan. Let them fry undisturbed for about a minute, then gently flip them. Fry on low heat, flipping them slowly, until golden on both sides and crispy.
Step 21: Remove the Karanji and place them on a wire rack to drain the excess oil. Before frying the next batch, bring the oil back to medium heat, then reduce it to low.
Let the fried Karanji cool down completely. Transfer them to an airtight container. They stay good for up to 15 days when stored properly.
Recipe FAQs
Karanji may break while deep-frying if it is overfilled or the edges are not sealed properly. Keep the coconut-rava filling away from the edges and press them firmly together to seal the edges before frying. Also, make sure the filling is not too moist.
The coconut-rava filling may become hard if the coconut is roasted for too long or powdered sugar is added while the roasted mixture is still warm. Let the roasted coconut-rava mixture cool completely before adding powdered sugar. This helps maintain a soft, melt-in-the-mouth Karanji filling.
Allow the fried Karanji to cool completely to room temperature before storing them in an airtight container. Never close them while still warm, as this traps moisture and turns Karanji soft. Keep them in a cool, dry place to maintain their crispness.
To make crispy Karanji, prepare a firm dough using maida and rava, and add the correct amount of oil or ghee to the flour. Fry the Karanji over low heat until golden and crispy. Let them cool completely before storing them in an airtight container.


Recipe Card
Karanji Recipe (Maharashtrian Style)
Video
Equipment
- 1 Deep bottom pan
Ingredients
For the Karanji Cover
- 2 cups all-purpose flour (Maida)
- ¼ cup rava (semolina)
- Salt to taste
- ¼ cup oil
For Karanji Stuffing
- ½ cup desiccated coconut (or 1 dry coconut, prepared as shown in the recipe)
- 2 tablespoon sesame seeds
- 1 tablespoon poppy seeds khus-khus
- 3 tablespoon barik rava semolina
- 1 tablespoon chopped almonds
- 1 tablespoon chopped cashews
- 2 tablespoon raisins
- ½ cup powdered sugar
- 1 teaspoon cardamom powder
- A small pinch of salt
- 2 tablespoon Ghee, divided
For Frying
- Cooking oil for frying
Instructions
For the Karanji Dough
- In a mixing bowl, add all-purpose flour (maida), rava, and salt to taste. Combine with a spoon.2 cups all-purpose flour (Maida), ¼ cup rava (semolina), Salt to taste
- Heat oil in a small tadka pan until hot. Carefully pour it over the flour mixture. Mix with a spoon while the oil is hot.¼ cup oil
- Once the mixture has cooled slightly, rub the oil into the flour using your fingers until it is evenly combined. It makes the outer covering crispy and flaky. Take a handful of the flour mixture and press it firmly in your palm. If it holds its shape, it is ready.
- Add water little by little and knead into a semi-stiff dough. The dough should be slightly firmer than the dough you prepare for roti or chapati. Cover the dough and let it rest for 30 minutes. Meanwhile, let's prepare the stuffing.
Make the Stuffing
- Take one dry coconut and remove the hard, outer brown shell using a peeler.
- Roughly chop this dry coconut into small pieces. Transfer them to a mixer grinder. Pulse a few times. Stop and check in between. Do not grind continuously, as the coconut may release oil and turn into a paste. Desiccated coconut is ready.
- Measure ½ cup of tightly packed desiccated coconut for the stuffing. You can also use store-bought desiccated coconut instead and skip steps 5 & 6.
- Heat 1 teaspoon of ghee in a pan over low heat. Add the desiccated coconut, sesame seeds, and poppy seeds. Roast on low heat, stirring continuously, until the coconut turns lightly golden. Do not let it turn brown. Transfer the mixture to a plate and keep it aside to cool down.½ cup desiccated coconut (or 1 dry coconut, prepared as shown in the recipe), 2 tbsp sesame seeds, 1 tbsp poppy seeds
- Heat 1 tablespoon ghee in the same pan over low heat. Add 3 tablespoon fine rava and roast, stirring continuously, until it turns lightly golden. Transfer it to the same plate with the roasted coconut.3 tbsp barik rava
- Heat 1 teaspoon ghee in the pan over low heat. Add the chopped almonds and cashews. Roast until lightly golden, then transfer them to the same plate.1 tbsp chopped almonds, 1 tbsp chopped cashews
- Add 1 teaspoon ghee to the pan and add the raisins. Roast until the raisins puff up. Transfer them to the same plate. Let all the roasted ingredients cool completely on the plate.2 tbsp raisins
- Add powdered sugar, cardamom powder, and a small pinch of salt to the plate. If you like, add a pinch of nutmeg powder for extra flavour. Mix everything well. The stuffing is ready. Keep this aside.½ cup powdered sugar, 1 tsp cardamom powder, A small pinch of salt
Shaping Karanji
- After resting the dough for 30 minutes, knead it again briefly. Divide the dough into 3 portions. Keep two portions covered while working with the first.
- Shape one portion into a log and cut it into approximately 1-inch pieces. Roll each piece between your palms into a smooth ball. Keep the dough balls covered to prevent them from drying out. Repeat with the remaining dough portions.
- Take one dough ball and flatten it slightly. Dust with a little flour and roll it into a small circle. Do not roll the dough too thin or too thick.
- Place a spoonful of stuffing on the lower half of the rolled circle, leaving the edges empty. Apply a little water along the edges.
- Fold the rolled circle over the filling to form a half-moon shape. Press the edges firmly to seal the Karanji and prevent the stuffing from coming out while frying the Karanji.
- Use a karanji cutter or pizza cutter to trim the edges. Collect the trimmed dough and add it to the remaining dough to make more karanji. Keep the shaped karanji covered with a slightly damp cloth.
- You can also seal and decorate the edges of the Karanji using a fork. Gently press the edges with the fork to seal them.
Frying Karanji
- Heat oil in a deep pan over medium heat. Once the oil is medium-hot (not very hot), reduce the heat to low.Cooking oil for frying
- Carefully add the Karanji to the oil. Do not overcrowd the pan. Let them fry undisturbed for about a minute, then gently flip them. Fry on low heat, flipping them slowly, until golden on both sides and crispy.
- Remove the Karanji and place them on a wire rack to drain the excess oil. Before frying the next batch, bring the oil back to medium heat, then reduce it to low.
- Allow the fried Karanji to cool down completely. Transfer them to an airtight container. They stay good for up to 15 days when stored properly.
Notes
- Use fine rava: Use fine rava for the filling. It blends well with the other ingredients and does not leave a coarse texture in your mouth while eating karanji.
- Fry at the right temperature: Heat the oil, then keep it on low heat while frying the karanji. If the oil is too hot, the outer covering will brown quickly without cooking properly. If the oil is not hot enough, the karanji will absorb too much oil and turn greasy.
- Keep the prepared karanji covered: Cover the shaped karanji with a clean, slightly damp cloth while you prepare the remaining ones. This prevents the outer covering from drying out and cracking.
- Please note that the nutrition information is for 1 karanji. The total number of Karanji may vary depending on the size of each piece.
- You can prepare the filling ahead and store it in an airtight container.
Nutrition
Nutrition information is automatically calculated, so should only be used as an approximation.

Preeti Nayak
This is my mom's Karanji recipe, and I've been making it for years. It always turns out well, and it brings back so many lovely memories of Diwali at home. Do try it this Diwali and share how it turned out for you. I'd love to hear your feedback!