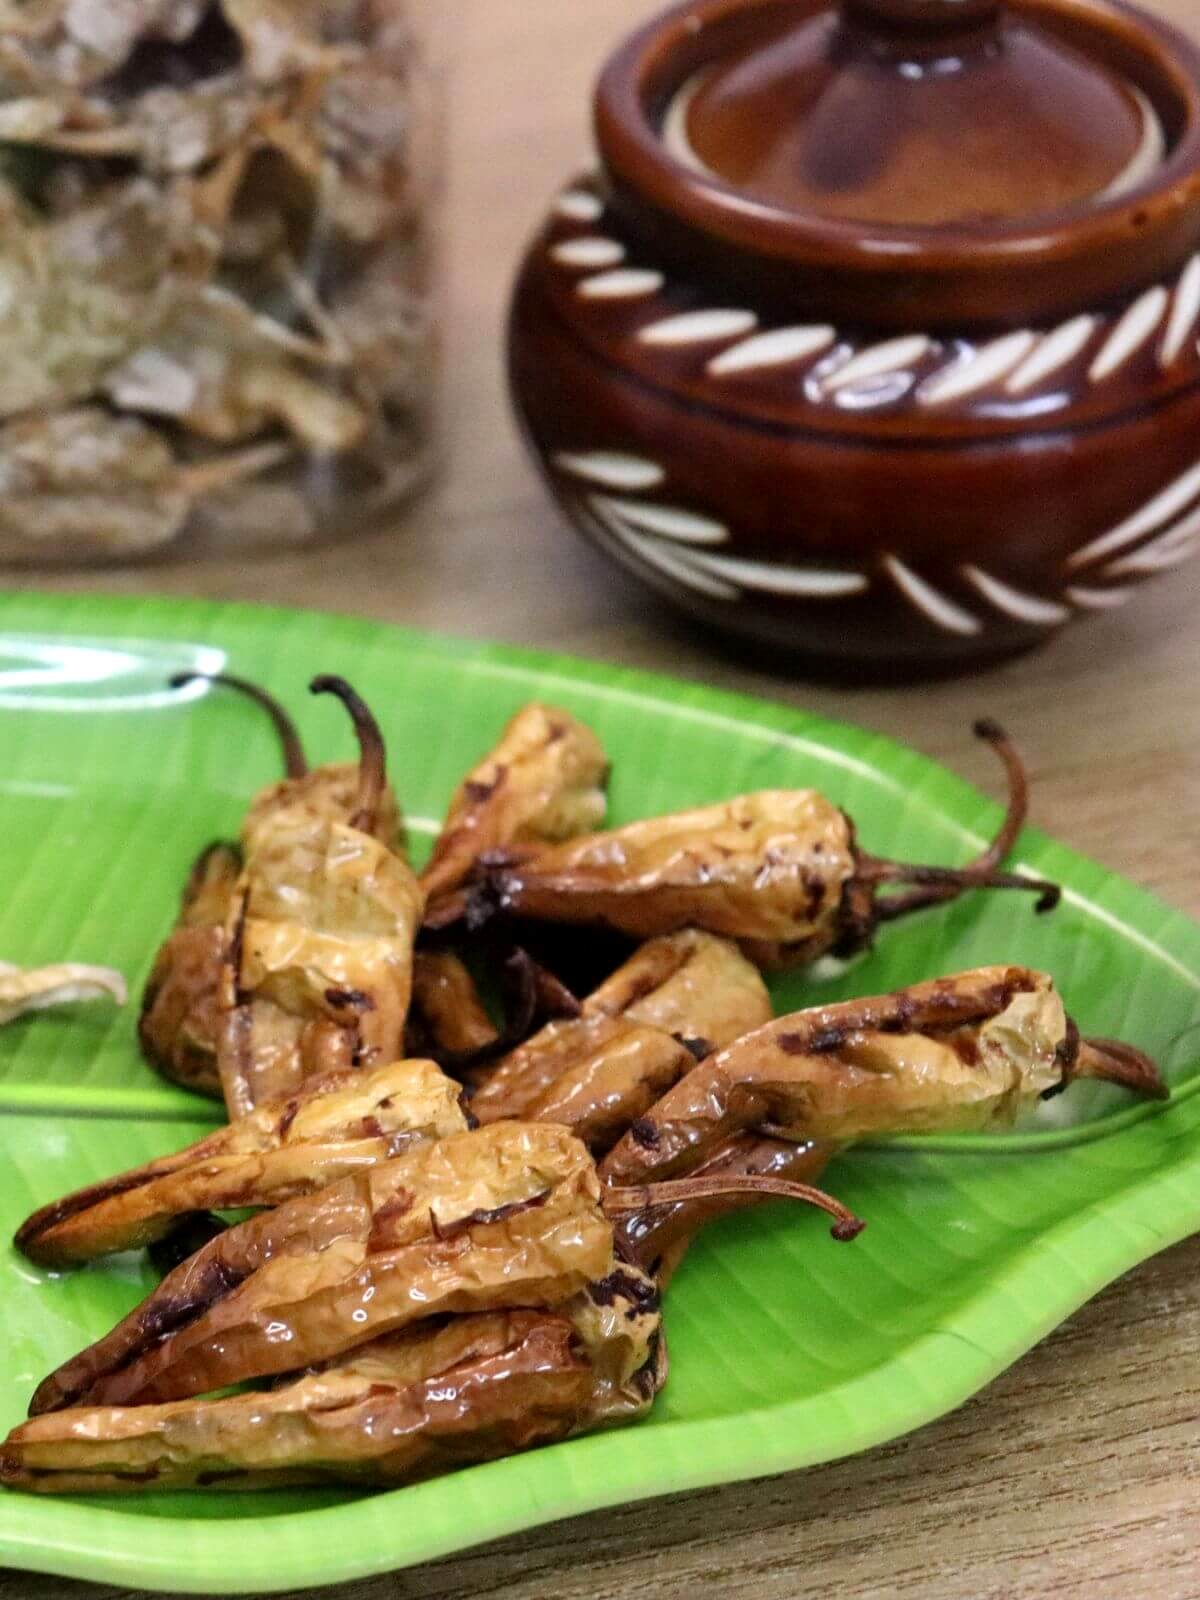
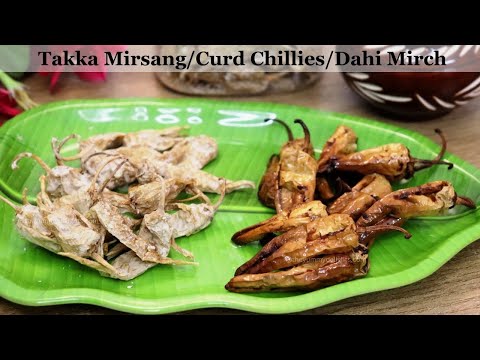
Learn how to make traditional curd chillies at home. Also known as Takka Mirsang, Mor Milagai, or Sandige Menasu, these sun-dried buttermilk chillies turn crispy, tangy, and spicy when fried. Enjoy this spicy South Indian condiment year-round with curd rice, steamed rice, or pulao. Follow this easy recipe with step-by-step photos and a quick video tutorial.
Summers are a great time to make these curd chillies (takka mirsang). Every year, I purchase a large batch of green chilies to make Takka mirsang and store them in an airtight container so we can enjoy them throughout the year. Its salty crunchy taste goes well with rice and any curry.
Especially during the rainy season, we love to fry these sun-dried curd chilies almost every day with papad and kuvalyacho vadyo (ash gourd fritters). For a complete meal, I like to serve them with steamed rice or jeera rice, dal fry, mooga gathi, and crispy sides like gobi 65, gobi manchurian, or bharwa bhindi/stuffed okra.
This curd chilies recipe is from Karnataka. Traditionally called takka mirsang or Sandige Menasu, it’s made with fresh Gokarna chilies, which are plump and mildly spicy. However, you can use any fresh, less spicy green chilies for this recipe.
"Sandige" in Kannada means "fried", and "menasu" means "chilies". "Majjige" in Kannada means buttermilk, and "menasu" or "menasinakayi" means chilies. "Takka mirsang" is a Konkani term for the same dish, where "tak" means buttermilk and "mirsang" means chilies.
Making buttermilk chilies, also known as takka mirsang, at home is easy. It takes seven days to sun-dry them, and you can enjoy these curd chilies year-round. Every family has its recipe for making buttermilk chilies. The process is generally the same, but there are differences in the ingredients. For example, some people like to add asafoetida (hing). I am sharing our traditional family recipe here, showing how we make them at home.
Ingredients Notes
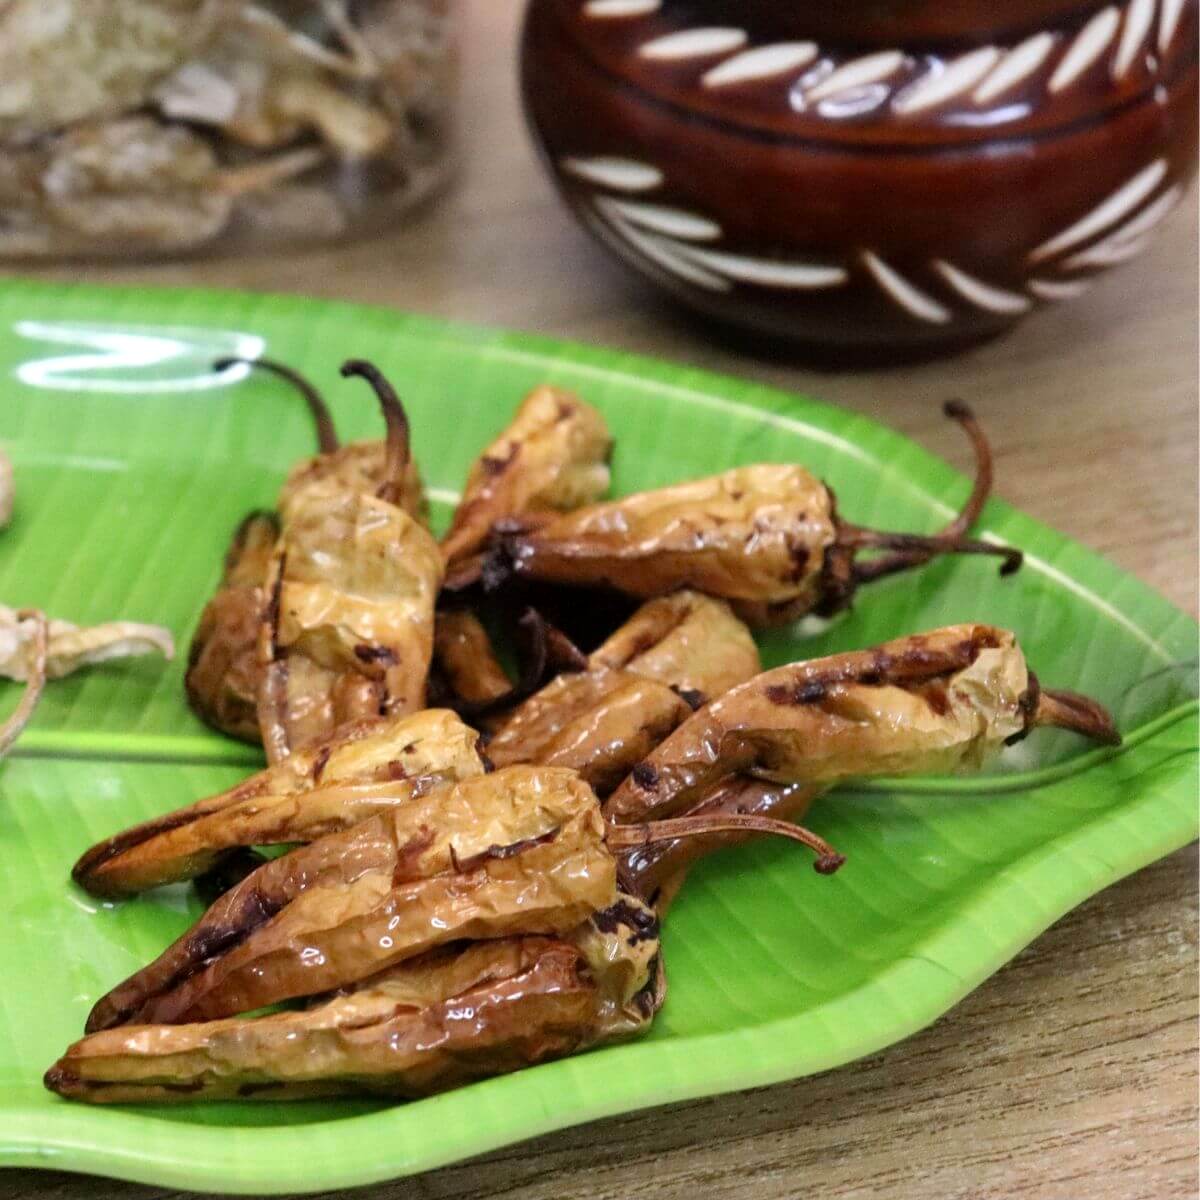
To make this dahi mirch recipe, you will need only four ingredients. Soaking chilies in a mixture of salted, sour curd, or buttermilk infuses them with a slightly salty, tangy yogurt flavor. They are sun-dried for a week until they are white, crisp, and completely dry. These sun-dried curd chilies (Mor Milagai) are then fried in oil and served with dishes such as curd rice, rice, and any curry, or pulao.
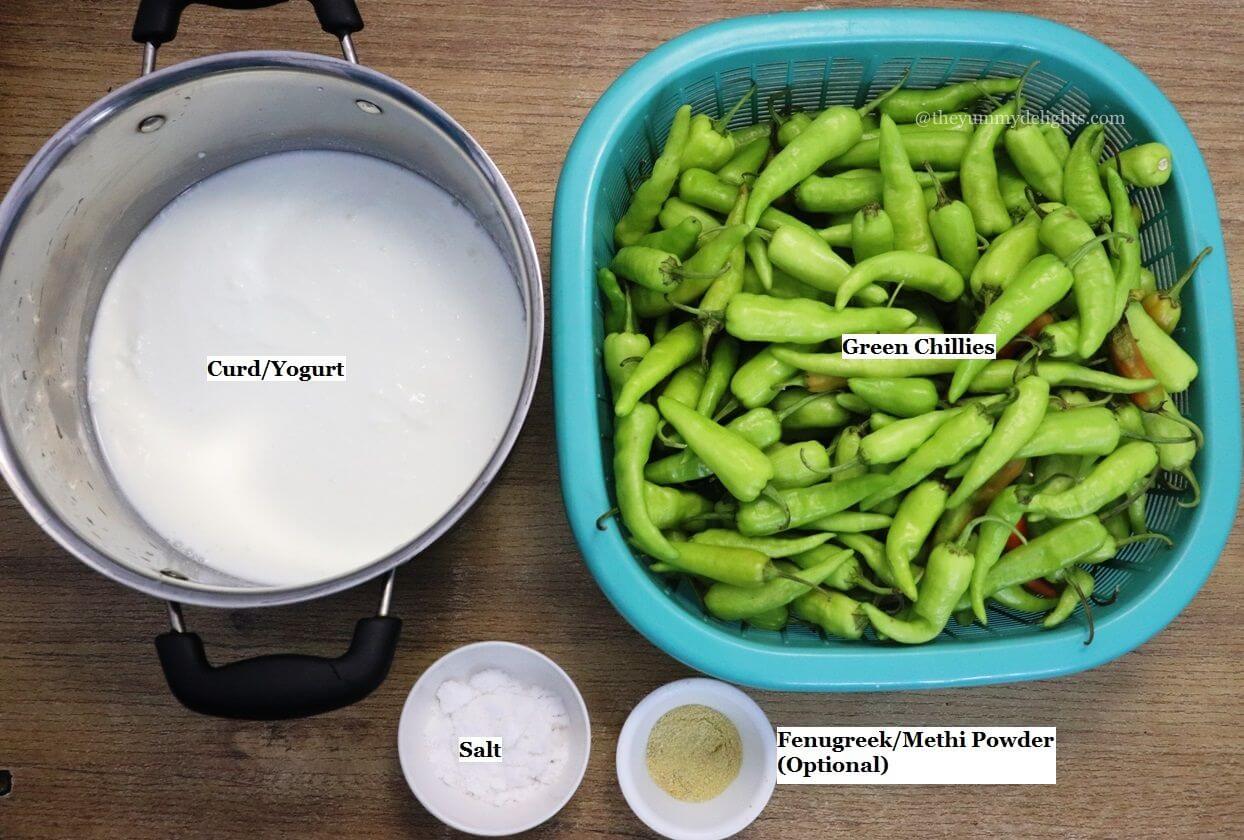
- Fresh Green Chillies: Traditionally we use Gokarna chillies to make this sun-dried buttermilk chili recipe, they are plump and less spicy. However, you can make it with any other plump, mild green chilies.
- Curd: This is the main ingredient for making curd chillies. We need thick sour buttermilk for this recipe. So, I added a little water and whisked it well to dilute it to the consistency of buttermilk (It should be thick, not watery). Also, it's important to use sour curd for this recipe. Do not use fresh curd for making curd chillies (takka mirsang).
- Salt: It helps to preserve sun-dried green chilies and adds flavor.
- Fenugreek Seeds/Methi: Ground fenugreek (methi) seeds, while optional, add a pleasant aroma to these sun-dried chili peppers. If you don't have ground fenugreek, you can dry-roast whole fenugreek seeds and then grind them using a mortar and pestle or a spice grinder. Be sure to sift the ground powder before adding it to the recipe.
For a detailed list of ingredients and their measurements, check out the recipe card below.
How to make Curd Chillies
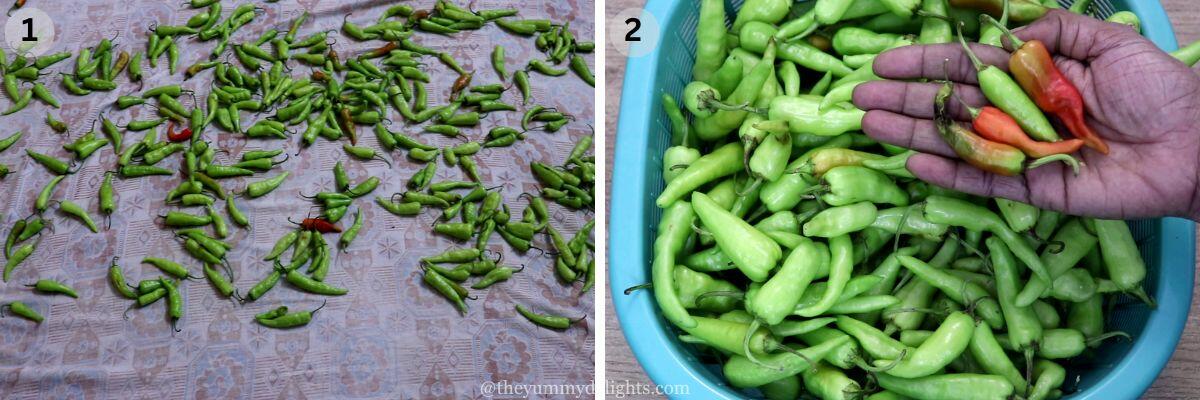
1) Rinse the green chilies thoroughly. Sun-dry or dry them under a fan for six hours. Discard any red chilies or those with black spots.
2) In the evening, combine sour curd (yogurt) with 1 cup of water in a bowl and whisk well. This creates buttermilk for the recipe. The buttermilk should have a slightly thick consistency, not watery.
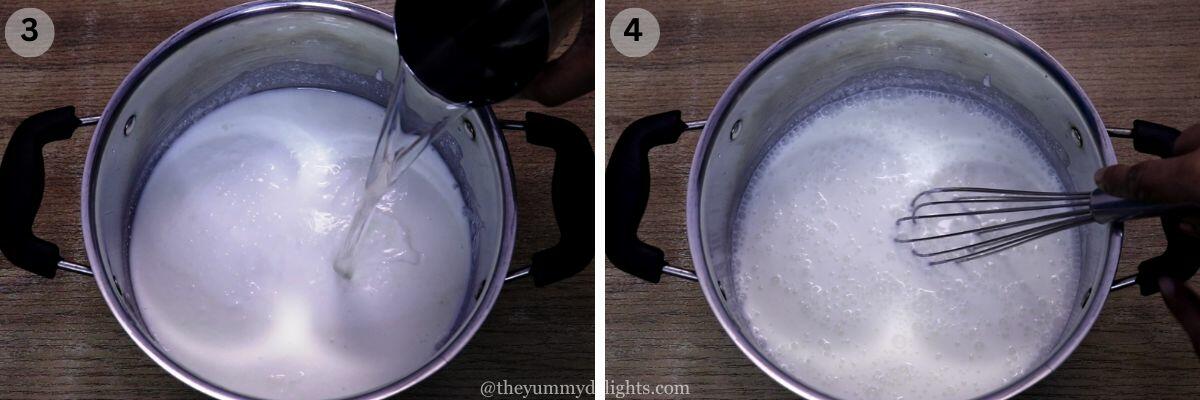
3) Add salt to the buttermilk. Taste and adjust the salt as needed. These chilies have a slightly salty flavor, so ensure the buttermilk is slightly salty.
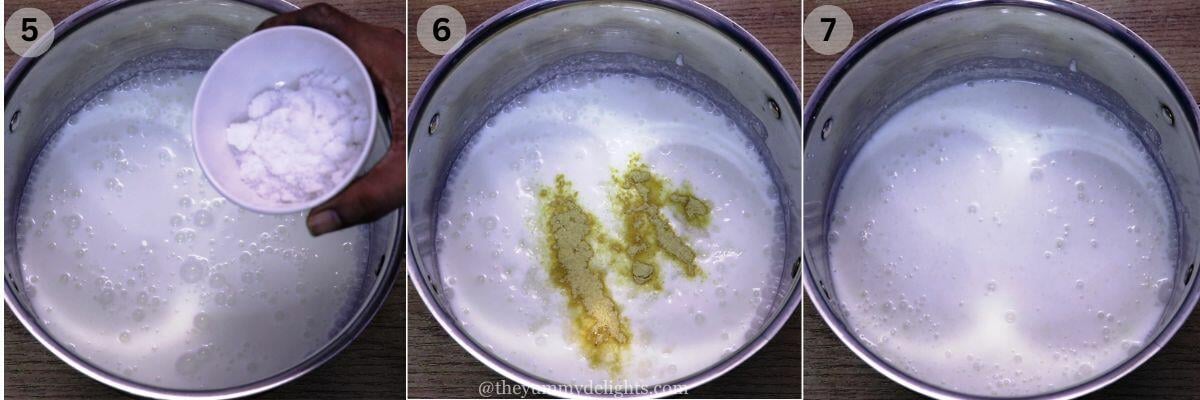
4) Add methi powder (fenugreek powder) to the buttermilk and whisk well to combine. If you don't have methi powder, skip it. Set this buttermilk mixture aside.
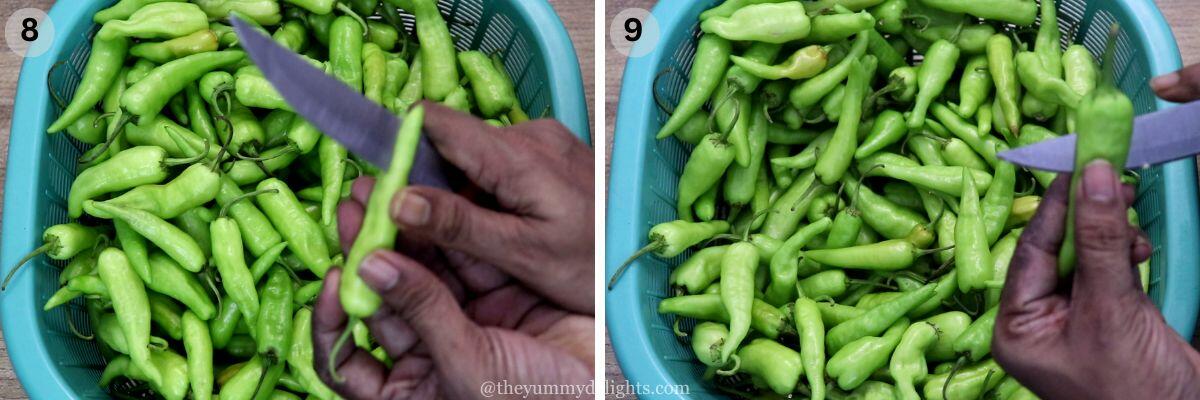
5) Prepare the green chilies. You can wear gloves for this step. Make a small slit in the bottom quarter of each chili and another small slit at the top, as shown in the image. This helps the chilies to absorb the flavors of the curd mixture. Set the prepared chilies aside.
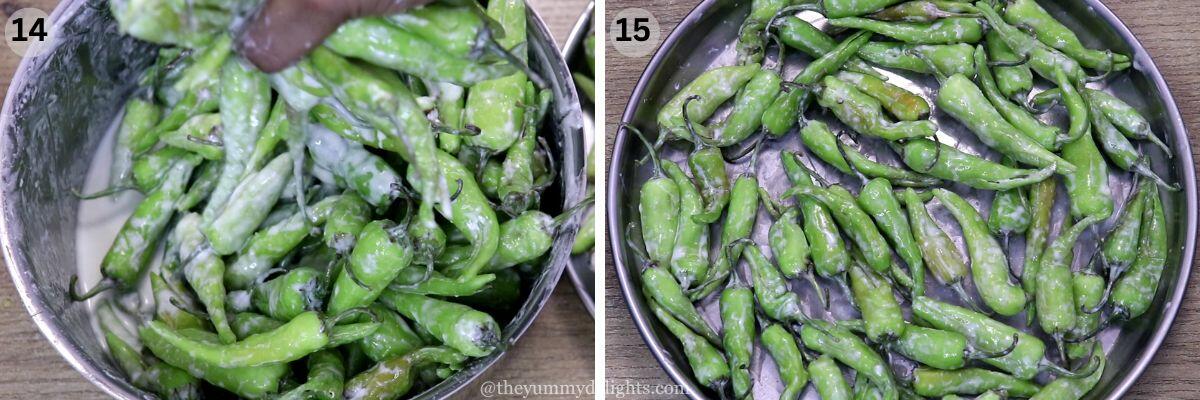
6) Use a large vessel that can hold all the chilies. Transfer the chilies into the buttermilk mixture, working in small batches for easier mixing. Ensure the chilies are well coated with the mixture.
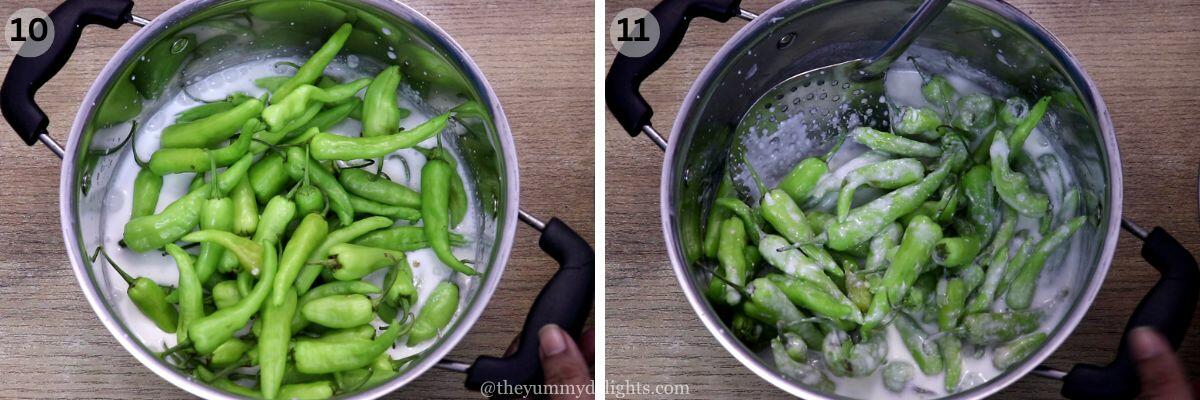
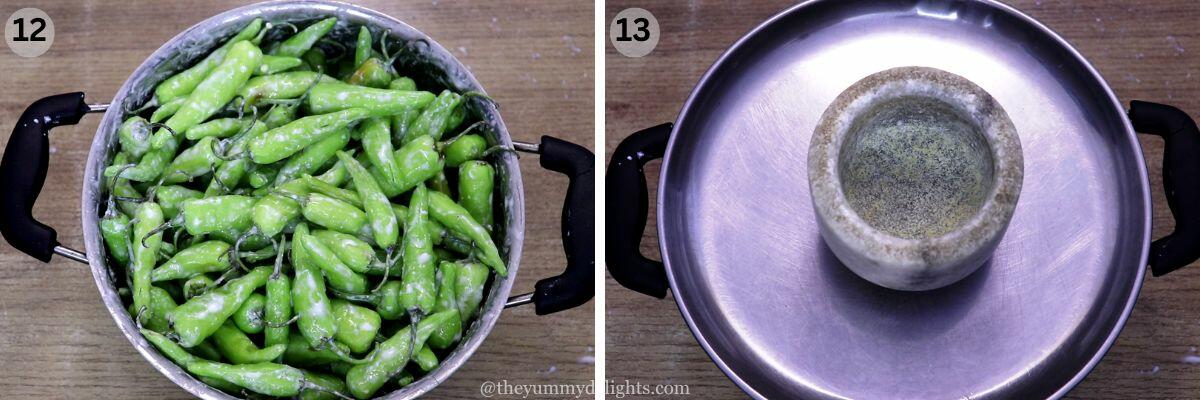
7) Cover the vessel and place a weight on the lid to ensure it closes tightly. Leave it at room temperature overnight. This allows the chilies to absorb the flavors of the curd/buttermilk.
8) The next morning (Day 1), gently squeeze the excess buttermilk from the chilies and spread them on a steel plate. Ensure sufficient spacing between the green chilies to prevent overlapping.
9) Cover and refrigerate the remaining buttermilk mixture.
10) Dry them in the sun.
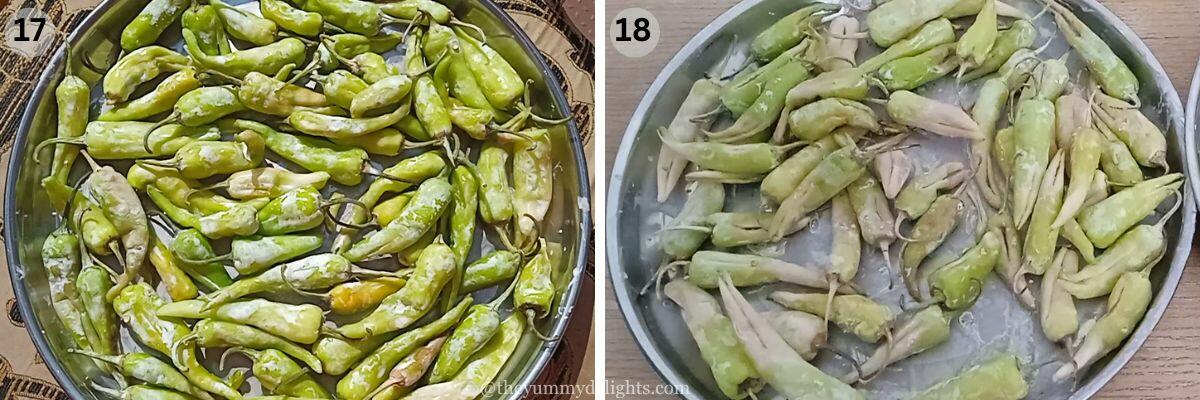
11) In the evening, the chilies will have partially dried (image 18). Transfer them back into the refrigerated buttermilk mixture (image 19), cover them with a lid, and leave them at room temperature overnight.
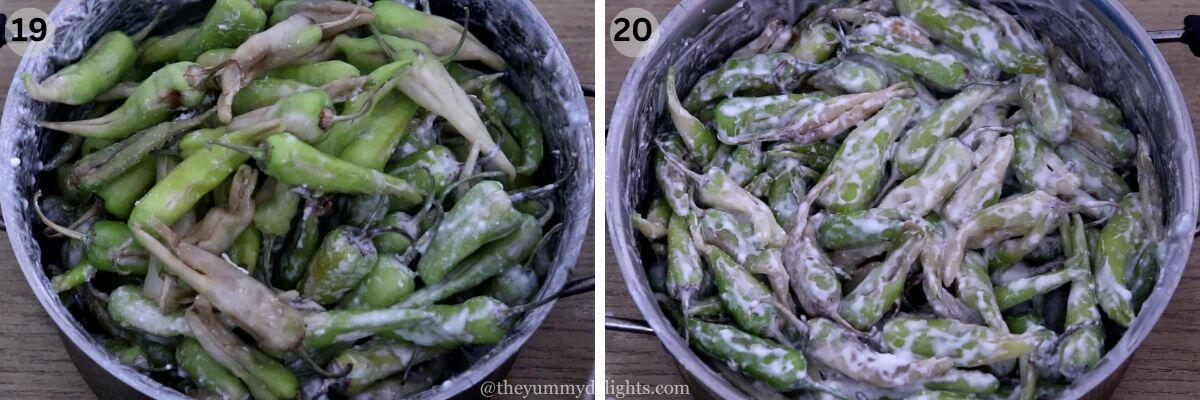
12) The next day (Day 2), repeat the sun-drying process from step 7. Store the remaining buttermilk mixture in the refrigerator. In the evening, return the chilies to the buttermilk mixture and leave them overnight.
13) The next day (Day 3), repeat the sun-drying process. Store the remaining buttermilk mixture in the refrigerator. In the evening, return the chilies to the buttermilk mixture and leave them overnight. This is the final day of this soaking process, as the chilies will have absorbed most of the buttermilk by now.
14) The following morning, sun-dry the chilies. In the evening, bring them indoors and keep them in a dry place. Continue to sun-dry these chilies for the next 3-4 days under bright sunlight until they are completely dry. This entire process takes approximately a week.
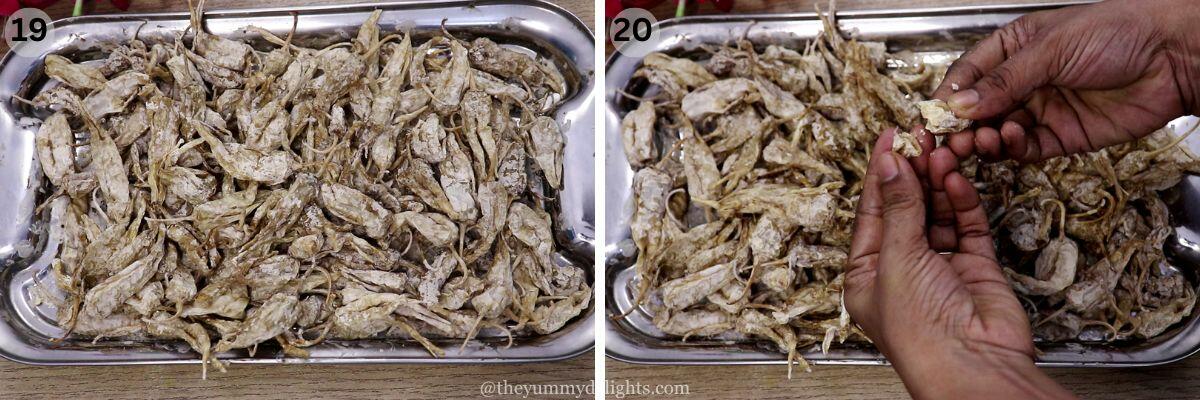
15) Store the dried chilies in an airtight container. They will keep for up to a year. Occasionally, sun-dry them to maintain their quality and extend their shelf life.
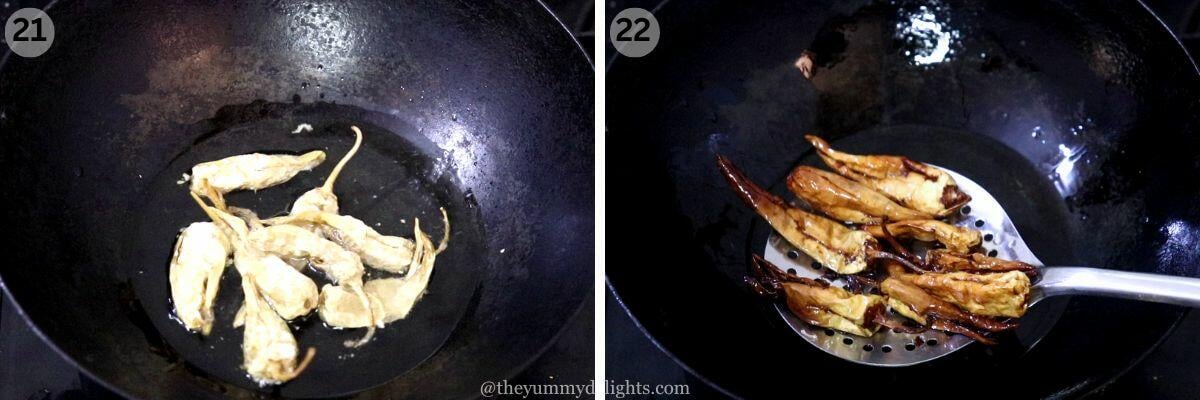
16) How to use: Heat oil in a pan over medium heat. Add the sun-dried curd chilies, and fry, stirring continuously, until golden and crisp. They fry quickly, within 30–40 seconds, so be quick. Remove from the heat.
Tips to make the Best Curd Chilies
- Choose the right chilies: Choose fresh green chilies that are plump and firm, not too thin or overly ripe. Discard the chillies that are red or have black spots.
- Use thick, slightly sour curd/buttermilk. This provides the best flavor.
- Use the right amount of salt to help with preservation and to balance the flavor. Always taste the buttermilk mixture to decide how much salt to add. It must taste slightly salty.
- The chilies must be completely dry and crisp before storing to prevent spoilage. A properly dried curd chili will easily break when you bend it.
- Store the dried curd chilies in an airtight container to keep them fresh. It stays good for a year.
- When frying, use medium heat and stir continuously to prevent the chilies from burning. These sun-dried curd chillies fry quickly within 30-40 seconds. Frying on high heat can burn them quickly.
Frequently Asked Questions
Curd chillies are mildly spicy as the marination process reduces the heat of the chillies. However, the spice level depends on the variety of green chilies that are used in the recipe.
If the chillies are properly dried and stored in an airtight container in a cool, dry place, they can last up to a year without spoiling. Occasionally sun-dry them to maintain their quality and extend their shelf life.
When frying, use medium heat and stir continuously to prevent the chillies from burning. These sun-dried curd chillies fry quickly within 30-40 seconds. Frying on high heat can burn them quickly.
If you try this recipe, please leave a comment and rating below. We'd love to hear your feedback.
For any questions or concerns while making this recipe, please get in touch with me directly at nayakprety@gmail.com. I'll try my best to respond promptly.
And, consider following me on social media so we can stay connected. I’m on Facebook, Pinterest, and YouTube!
Recipe Card
Curd Chillies (Sandige Menasu Recipe)
Video
Equipment
- A large vessel and a lid
Ingredients
- 1 kg 250 grams Gokarna Chilies or Use any plump green chilies with mild heat.
- 1 litre sour curd Do not use fresh curd for this recipe. Check how to make cour curd in notes.
- 3 teaspoon salt
- ½ teaspoon methi powder fenugreek powder
Instructions
- Rinse the green chilies thoroughly. Sun-dry or dry them under a fan for six hours. Discard any red chilies or those with black spots.
- In the evening, combine sour curd (yogurt) with 1 cup of water in a bowl and whisk well. This creates buttermilk for the recipe. The buttermilk should have a slightly thick consistency, not watery.
- Add salt to the buttermilk. Taste and adjust the salt as needed. These chilies have a slightly salty flavor, so ensure the buttermilk is also slightly salty.
- Add methi powder (fenugreek powder) to the buttermilk and whisk well to combine. If you don't have methi powder, skip it. Set this buttermilk mixture aside.
- Prepare the green chilies. You can wear gloves for this step. Make a small slit in the bottom quarter of each chili and another small slit at the top, as shown in the image. This helps the chilies to absorb the flavors of curd mixture. Set the prepared chilies aside.
- Use a large vessel that can hold all the chilies. Transfer the chilies into the buttermilk mixture, working in small batches for easier mixing. Ensure the chilies are well coated with the mixture. Cover the vessel and place a weight on the lid to ensure it closes tightly. Leave it at room temperature overnight. This allows the chilies to absorb the flavors of the curd/buttermilk.
- The next morning (Day 1), gently squeeze out the excess buttermilk or th curd mixture rom the chilies and spread them on a steel plate. Ensure sufficient spacing between the green chilies to prevent overlapping. Dry them in the sun.
- Cover and refrigerate the remaining buttermilk mixture.
- In the evening, the chilies will have partially dried. Transfer them back into the refrigerated buttermilk mixture, cover with lid, and leave them at room temperature overnight.
- The next day (Day 2), repeat the sun-drying process from step 7. Store the remaining buttermilk mixture in the refrigerator. In the evening, return the chilies to the buttermilk mixture and leave them overnight.
- The next day (Day 3), repeat the sun-drying process again. Store the remaining buttermilk mixture in the refrigerator. In the evening, return the chilies to the buttermilk mixture and leave them overnight. This is the final day of this soaking process, as the chilies will have absorbed most of the buttermilk by now.
- The following morning, sun-dry the chilies. In the evening, bring them indoors and keep them in a dry place. Continue to sun-dry these chilies for the next 3-4 days under bright sunlight until they are completely dry. This entire process takes approximately a week. Store the dried chilies in an airtight container. They will keep for up to a year. Occasionally, sun-dry them to maintain their quality and extend their shelf life.
- How to use: Heat oil in a pan over medium heat. Add the sun-dried curd chillies, and fry, stirring continuously, until golden and crisp. They fry quickly, within 30–40 seconds, so be quick. Remove from the heat.
Notes
- To make sour curd, leave it at room temperature for 3-4 hours. In a cool climate, it may take 4-6 hours.
- Some people like to add a pinch of asafoetida (hing) to the curd or buttermilk mixture. You can add if you want to.
- Choose the right chillies: Choose fresh green chillies that are plump and firm, not too thin or overly ripe. Discard the chillies that are red in color or have black spots.
- Use thick, slightly sour curd/buttermilk. This provides the best flavor.
• Use the right amount of salt to help with preservation and to balance the flavor. Always taste the buttermilk mixture to decide how much salt to add. It must taste slightly salty. - The chillies must be completely dry and crisp before storing to prevent spoilage. A properly dried curd chilli will easily break when you bent it.
- Store the dried curd chillies in an airtight container to keep them fresh. It stays good for a year.
- When frying, use medium heat and stir continuously to prevent the chillies from burning. These sun-dried curd chillies fry quickly within 30-40 seconds. Frying on high heat can burn them quickly.
- 172 calories per 100 gram chilies. Read our full nutrition disclaimer here.
Nutrition
Nutrition information is automatically calculated, so should only be used as an approximation.


Preeti
These curd chilies are a must-have at our home. Every vegetarian meal has to be accompanied by these crispy chilies. It's a tradition for us to make them every year in the summer. I hope you'll give them a try too.